
Lightweight services that will make your Raspberry Pi 3 shine again
If you have a Raspberry Pi 3 collecting dust in a drawer because you think it’s outdated, this post will prove you wrong. We’ll show you several simple, lightweight and useful services that will give your device a second life.
All of them are:
- Self-hosted
- Local
- Private
- Free
- Perfectly suitable for a Raspberry Pi 3
If you’ve got a dusty Raspberry Pi 3 in a drawer and think it’s obsolete, think again
No cloud subscriptions or third-party dependency. No extra hardware required.
What we’re using
For this project we’re using a Raspberry Pi 3B+:
- Quad-core 1.4 GHz CPU
- 1 GB RAM
- WiFi and bluetooth
- 16Gb MicroSD card
For better performance we recommend using ethernet instead of WiFi. Although we are using only a microSD card in this guide, for long-term reliability you may consider an SSD (via HAT) in the future.
Install Raspberry Pi OS Lite (64-bit)
We will install Raspberry Pi OS Lite (64-bit) to save space and resources. Flash the OS to your microSD card and configure:
- Hostname
- SSH
- Network
You can connect remotely using SSH or Raspberry Pi Connect.
Once installed and booted, update the system:
sudo apt updatesudo apt upgrade -y
Note: This will be the starting point for each of the guides presented below.
Pi-hole: network ad blocking
Pi-hole blocks ads at the DNS level for every device on your LAN, speeding up browsing and improving privacy. It needs a static IP on your Pi so routers don’t reassign it and break DNS resolution.
Why add it: instant, visible benefit for every device on the network with almost no maintenance.
These are the steps to install Pi-hole on your Raspberry Pi 3:
1. Set a static IP address
Pi-hole requires your device to have a static IP address; otherwise, it will stop working if your network assigns a new IP to it, which can happen when the router restarts.
Run:
sudo nmtui
Edit your connection (ethernet or wifi) and assign a static IP.
Reboot:
sudo reboot
2. Download and install Pi-hole
Run the following command:
curl -sSL https://install.pi-hole.net | bash
- Follow the setup wizard carefully. IMPORTANT: Write down the default admin password.
- Note the admin URL shown during installation.
- Change the password after first login.
3. Configure router DNS
Log into your router admin panel.
Go to:
- DHCP Server
- DNS configuration
Set the primary DNS server to your Raspberry Pi’s IP. Save and reboot the router.
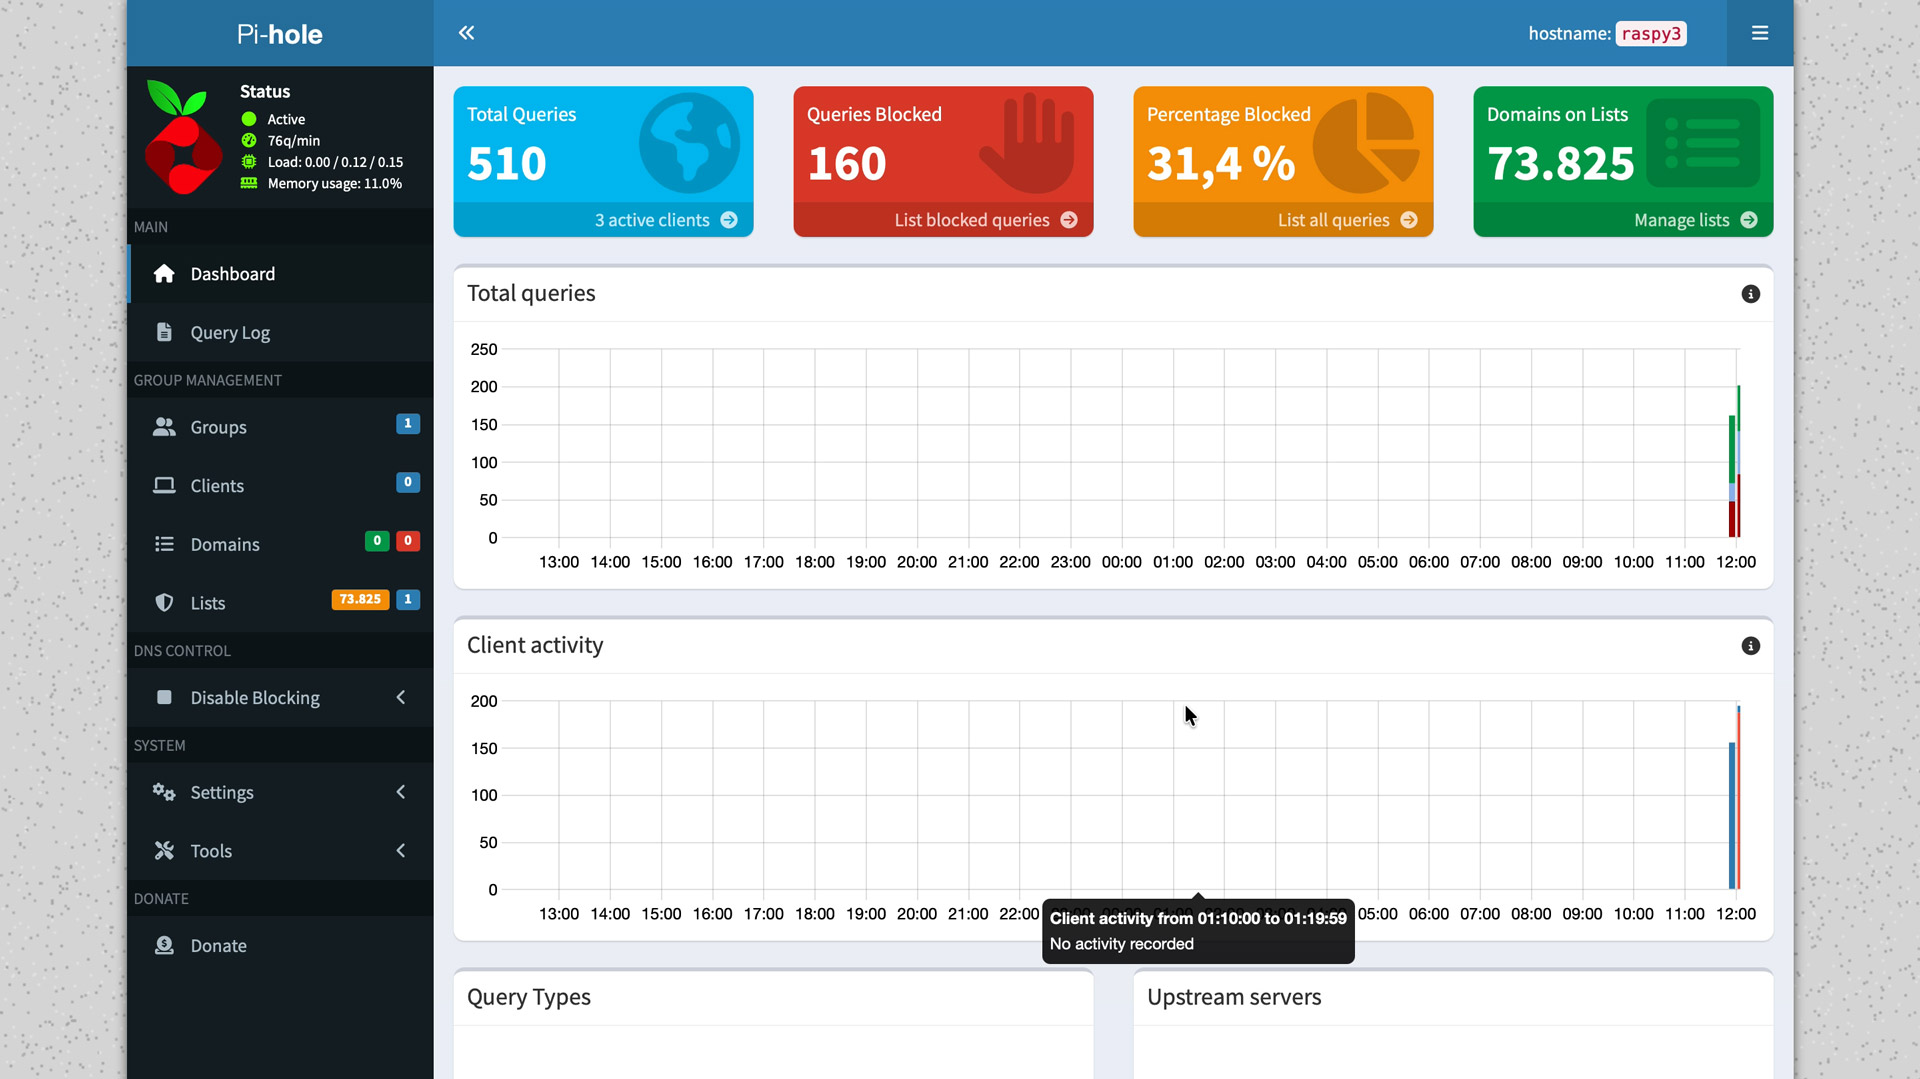
4. Access the admin panel
Open in browser:
http://YOUR_PI_IP/admin
Example: http://192.168.1.159/admin
Configure upstream DNS servers and enjoy ad-free browsing across your entire local network. This will not only make your browsing experience more enjoyable, but also faster. You can monitor real-time statistics from the dashboard, and remember that the official Pi-hole documentation provides extensive information on additional configurations and customization options for your ad-blocking service.
Watcharr: self-hosted, open-source, watchlist
The next tool we’re going to try is Watcharr, an app that lets you create lists of movies and TV shows you want to watch or have particularly enjoyed. You can organize your own lists however you like, helping you avoid wasting time deciding what to watch or scrolling endlessly through streaming catalogs, only to end up watching something at random out of frustration.
Why add it: keeps your watch queue organized and private, accessible only within your home network.
1. Install Docker
To install Watcharr, the first step is to set up Docker, the popular tool that lets you install and manage applications as independent containers. We have a step-by-step guide on the blog explaining how to install Docker, follow it first, then come back to this point.
2. Create and enter project folder
sudo mkdir -p /opt/stacks/watcharrcd /opt/stacks/watcharr
3. Create and edit Docker Compose file
sudo nano compose.yaml
then paste inside the stack:
version: "3"

services:
  watcharr:
    image: ghcr.io/sbondco/watcharr:latest
    container_name: watcharr
    ports:
      - 3080:3080
    volumes:
      - ./data:/data
    restart: unless-stopped
Save (Ctrl+O) and exit (Ctrl+X)
4. Deploy the stack
docker compose up -d
5. Access Watcharr
Once the process is complete, open a browser on your computer and go to the IP address of your Raspberry Pi, followed by port 3080, in our case: http://192.168.1.XXX:3080
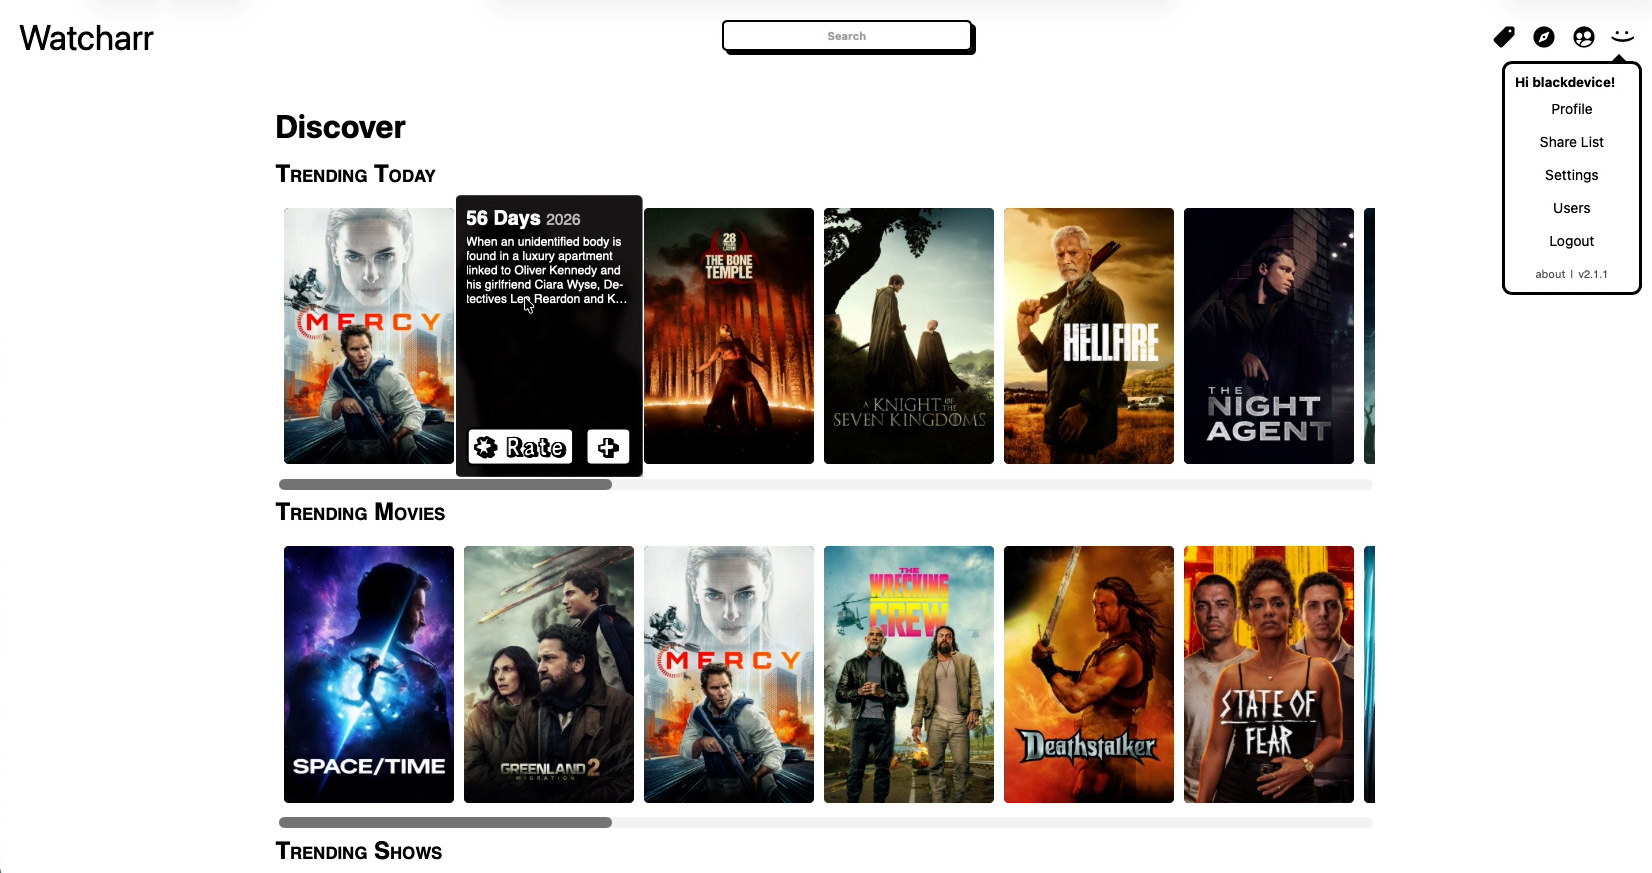
This will take you to the Watcharr welcome screen, where you can create your account. Remember, everything is completely private and local. Your data isn’t being sent anywhere.
Once logged in, you can start adding content to your watchlist or favorites. Use the search, create and organize your lists, and add movies or series you want to watch, have already enjoyed, or are currently following so you won’t forget!
moOde Audio: convert old speakers into a smart streamer
moOde Audio turns the Pi into a high-quality audio streamer that can drive powered speakers and stream from services like Spotify (depending on account/setup).
Why add it: a delightful, low-effort project that resurrects old audio gear into a modern streamer.
1. Installation
moOde is available directly inside Raspberry Pi Imager.
- Open Raspberry Pi Imager
- Select moOde Audio from the media OS list
- Configure host, user and network settings
- Flash to microSD
- Insert the card, boot the Pi, and wait a few minutes while the installation process is running.
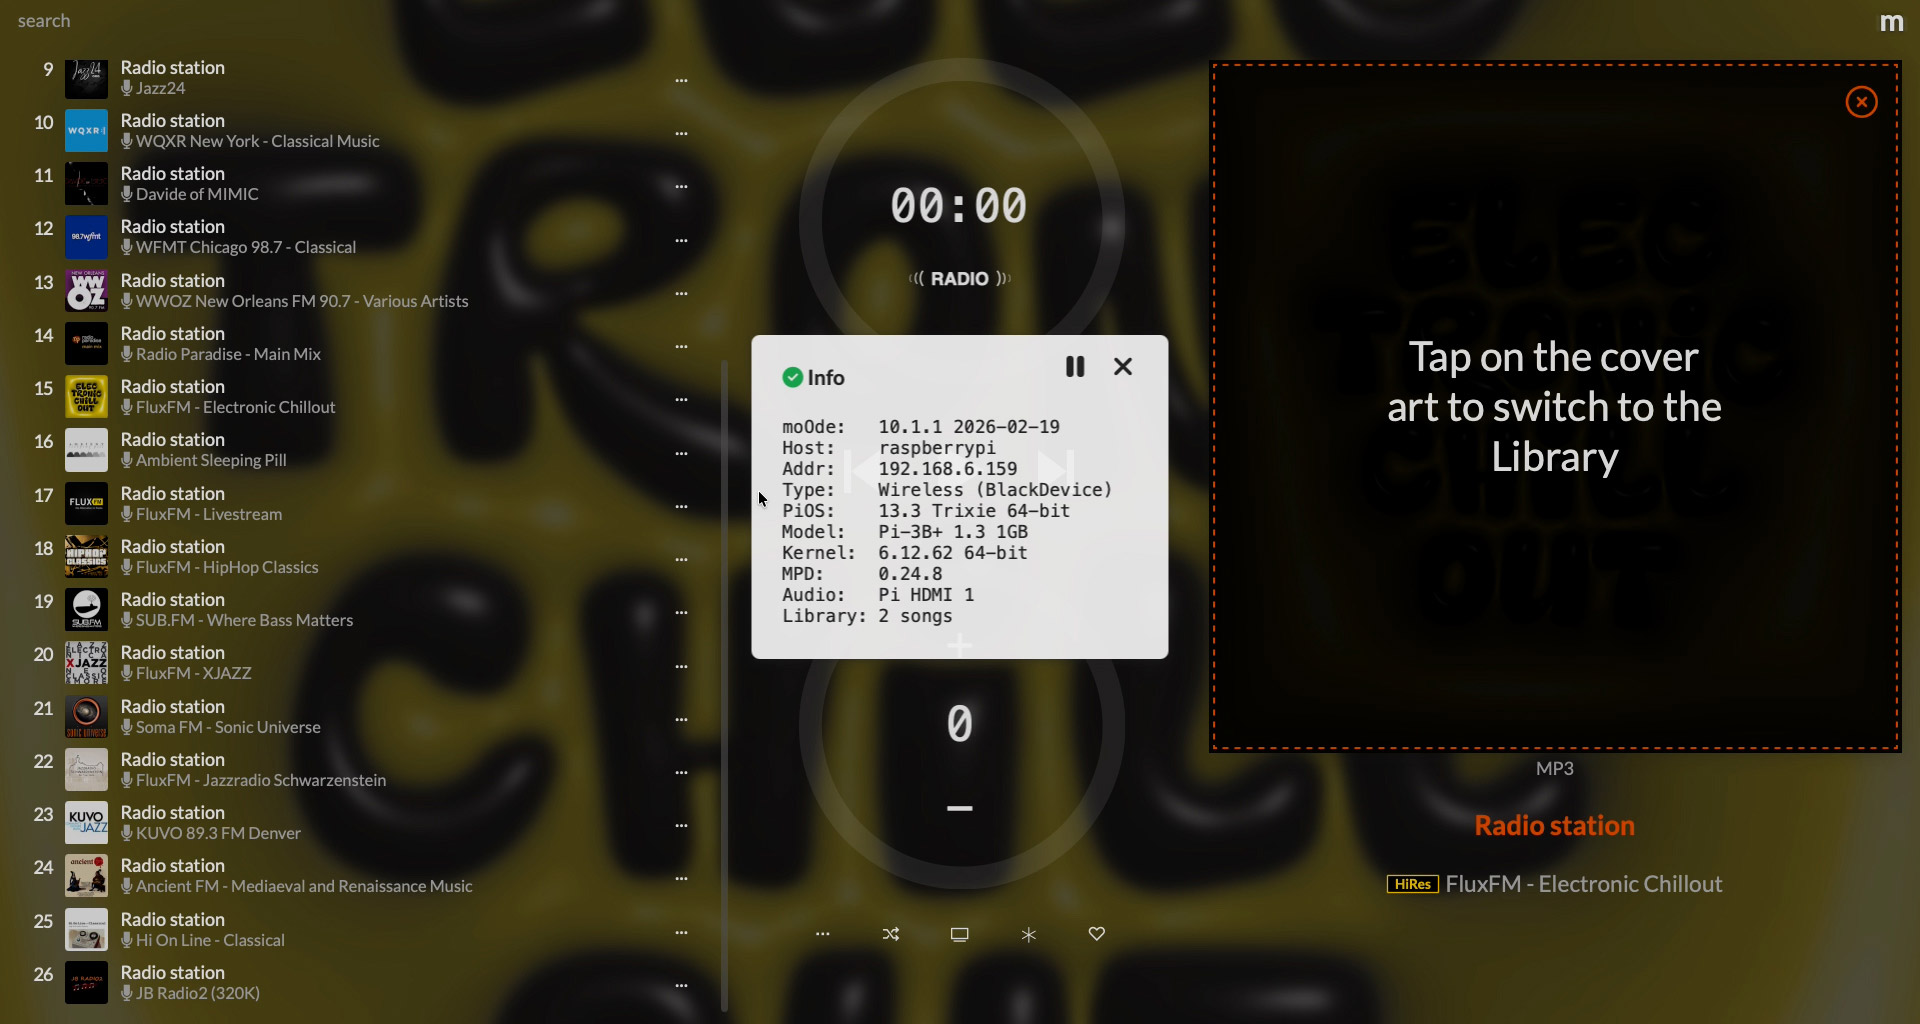
2. Access the Interface
Open your browser and go to:
http://YOUR_PI_IP
From there you can configure:
- Audio output
- Bluetooth streaming
- Spotify integration
- Playback settings
You now have a modern audio streaming system. Visit moOde Audio’s official website for more information and customization guides.
Uptime Kuma: watch your services from home
Uptime Kuma is a free, open-source tool for monitoring the availability and real-time status of network services, such as websites, databases, Docker containers, or online game servers. It’s a simple, easy-to-install solution, making it perfect for a device like the Raspberry Pi 3.
Why add it: gives you meaningful alerts and uptime graphs without complexity.
1. Install Docker
To install Uptime Kuma, the first step is to set up Docker on your Raspberry Pi. You can follow our step-by-step guide on the blog to do this.
2. Create and enter folder
mkdir -p ~/uptime-kumacd ~/uptime-kuma
3. Create and edit the Docker Compose file
nano docker-compose.yml
Inside the editor, paste the stack:
version: '3'

services:
  uptime-kuma:
    image: louislam/uptime-kuma:latest
    container_name: uptime-kuma
    ports:
      - "3001:3001"
    volumes:
      - ./data:/app/data
    restart: unless-stopped
Save (Ctrl+O) and exit (Ctrl+X)
4. Deploy
docker compose up -d
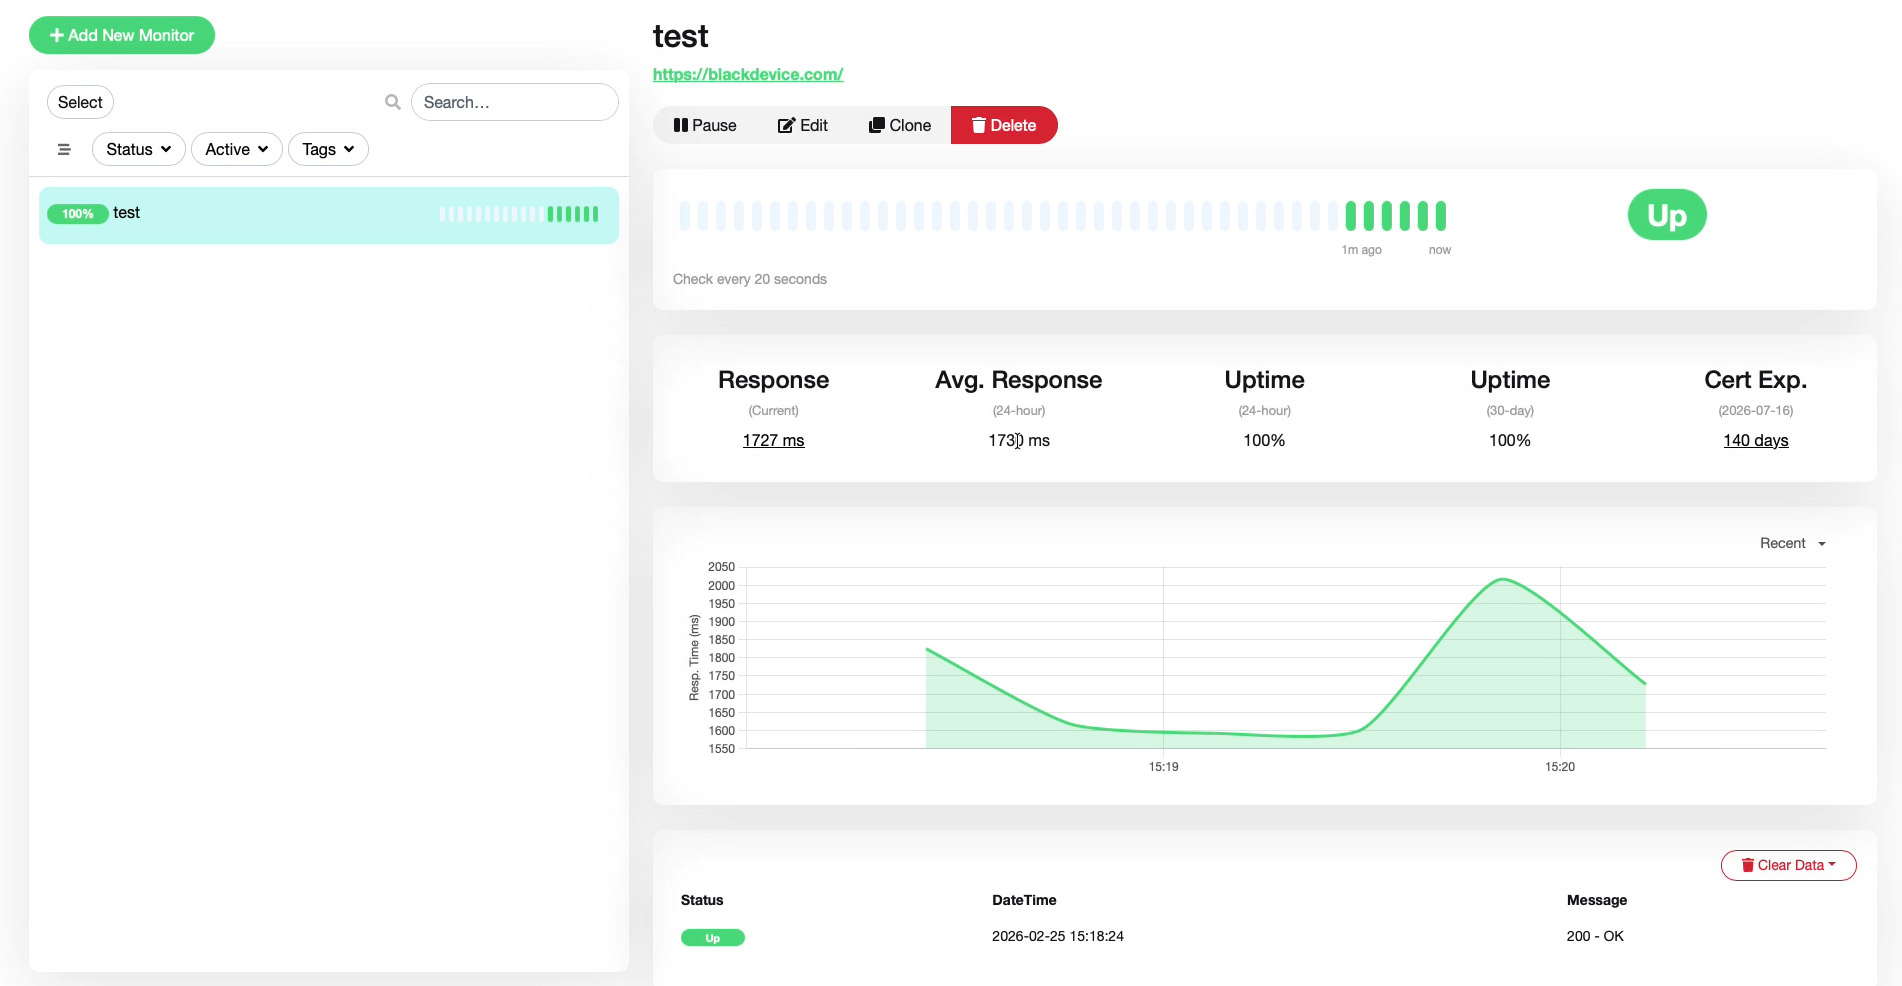
5. Access Uptime Kuma
Open a browser and go to the IP address of your Raspberry Pi, followed by port :3001, in our case: 192.168.6.159:3001
You’ll arrive at the Uptime Kuma welcome screen. Create a local admin account, and you’ll have access to the dashboard of your new uptime monitor, ready to start tracking whatever you want. For this example, we’ll run a simple test to monitor the performance of our website, blackdevice.com.
On the official Uptime Kuma website, you can find more information about everything this simple yet powerful tool can do; perfect for running on your Raspberry Pi 3.
Netdata: instant insight into your Pi’s health
The last service we’re going to try in this roundup guide is Netdata, a real-time monitoring tool that displays your system’s internal status through a highly visual web interface.
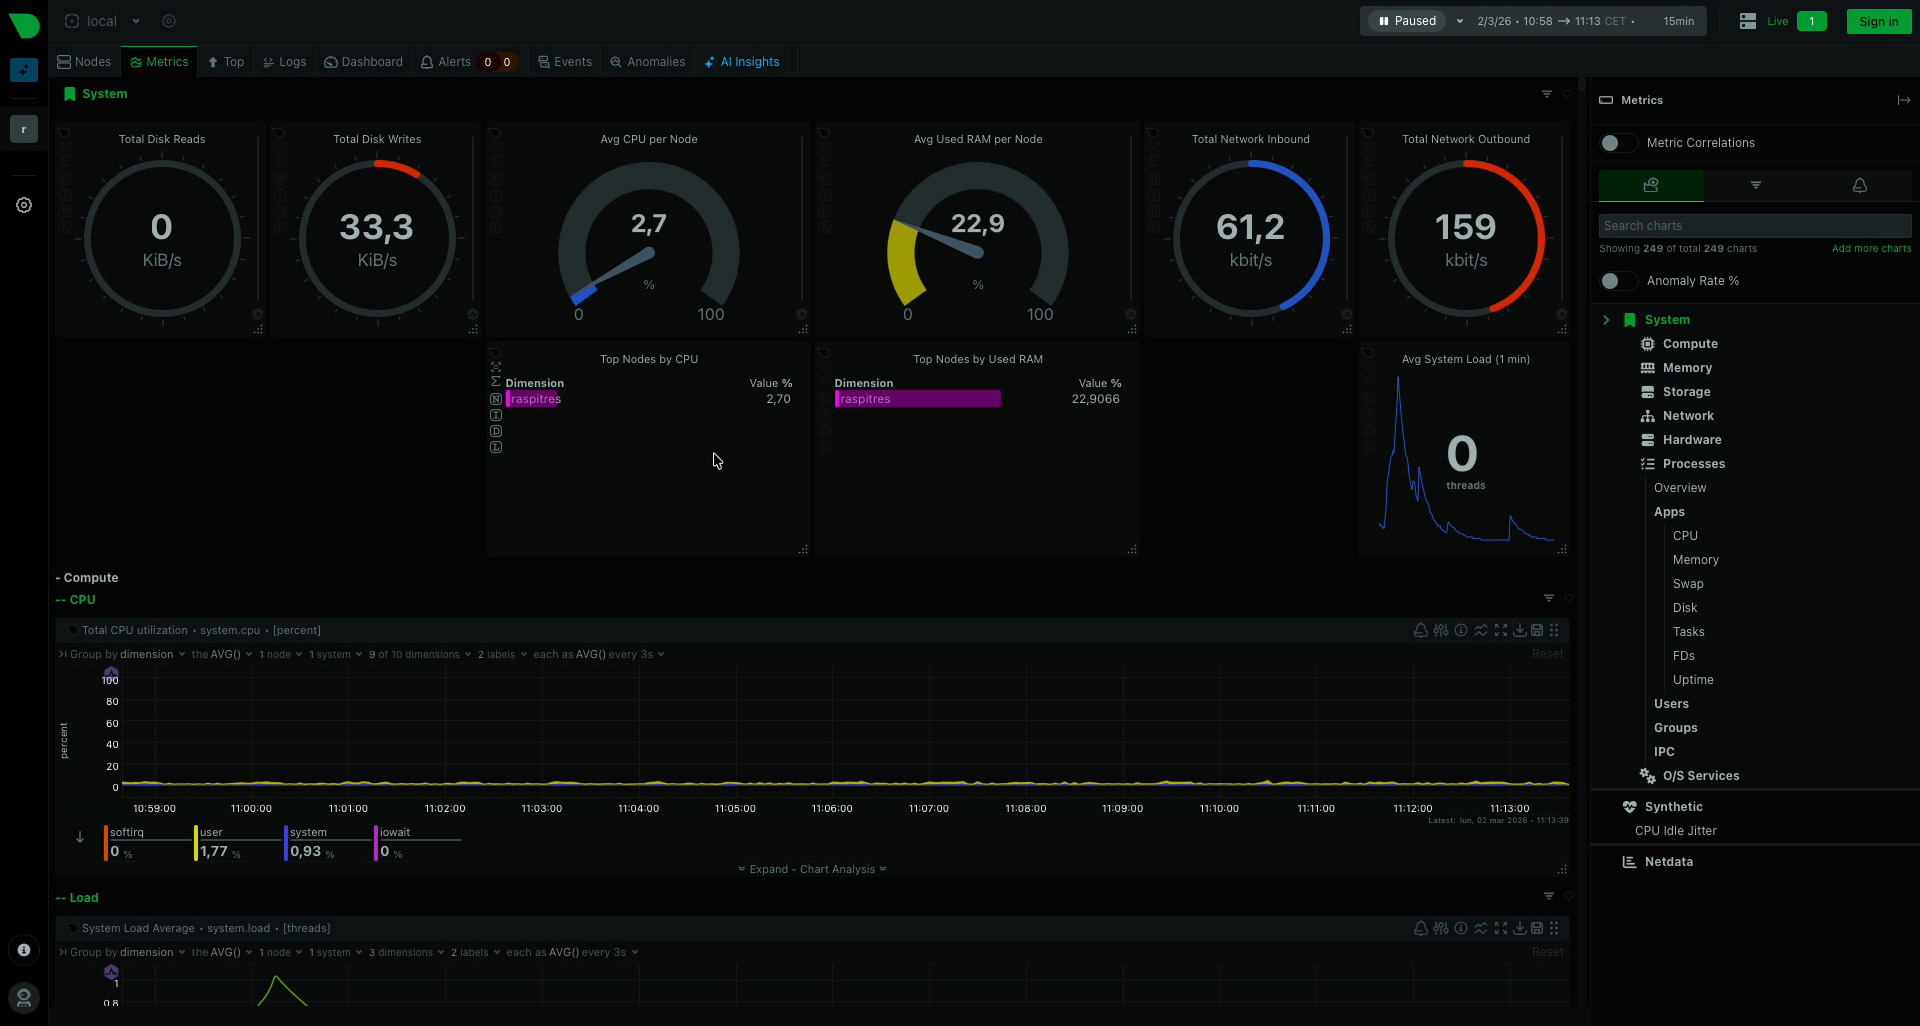 On a Raspberry Pi 3, it lets you instantly see:
- CPU and memory usage
- Temperature
- Network activity
- Disk read/write operations
- Active processes
- Resource consumption by service
What is it for?
Netdata helps you understand what’s happening on your machine at any moment:
- Detect if something is using too much RAM
- See if a service is overloading the CPU
- Check if the network is running properly
- Diagnose system bottlenecks
It’s especially useful when running multiple services (like Pi-hole or Uptime Kuma) and you want to make sure your Raspberry Pi stays stable and performs reliably.
1. Install WGET
First, we install WGET, which will allow us to download and compile Netdata on our Raspberry Pi. To do this, run:
sudo apt install wget
2. Install and compile Netdata
wget -O /tmp/netdata-kickstart.sh https://my-netdata.io/kickstart.sh && sh /tmp/netdata-kickstart.sh
Confirm (Y) when prompted.
3. Access Netdata dashboard
Open a new browser tab and access http://YOUR_PI_IP:19999
You will now see real-time system statistics.
Netdata is extremely useful when running multiple services on a Raspberry Pi 3, ensuring your system remains stable.
Conclusion
A Raspberry Pi 3 can still be a valuable, low-power tool in your lab or home network. With Pi-hole, Watcharr, moOde Audio, Uptime Kuma and Netdata you cover privacy, media, audio, monitoring and system visibility; without extra hardware or cloud subscriptions. Try one service at a time and enjoy the process: small projects lead to big gains.
But your Pi can do even more! On our blog, you can find additional tutorials such as:
- Retro gaming emulators to relive classic games
- Audio streaming with Volumio for high-quality music playback
- Self-hosted NAS solutions to create your private cloud
We hope this guide inspires you to explore new ways to use your Raspberry Pi. If you try these setups or have your own ideas, share them with us on our social media channels, and don’t forget to subscribe to our newsletter for more articles and project updates from us.