

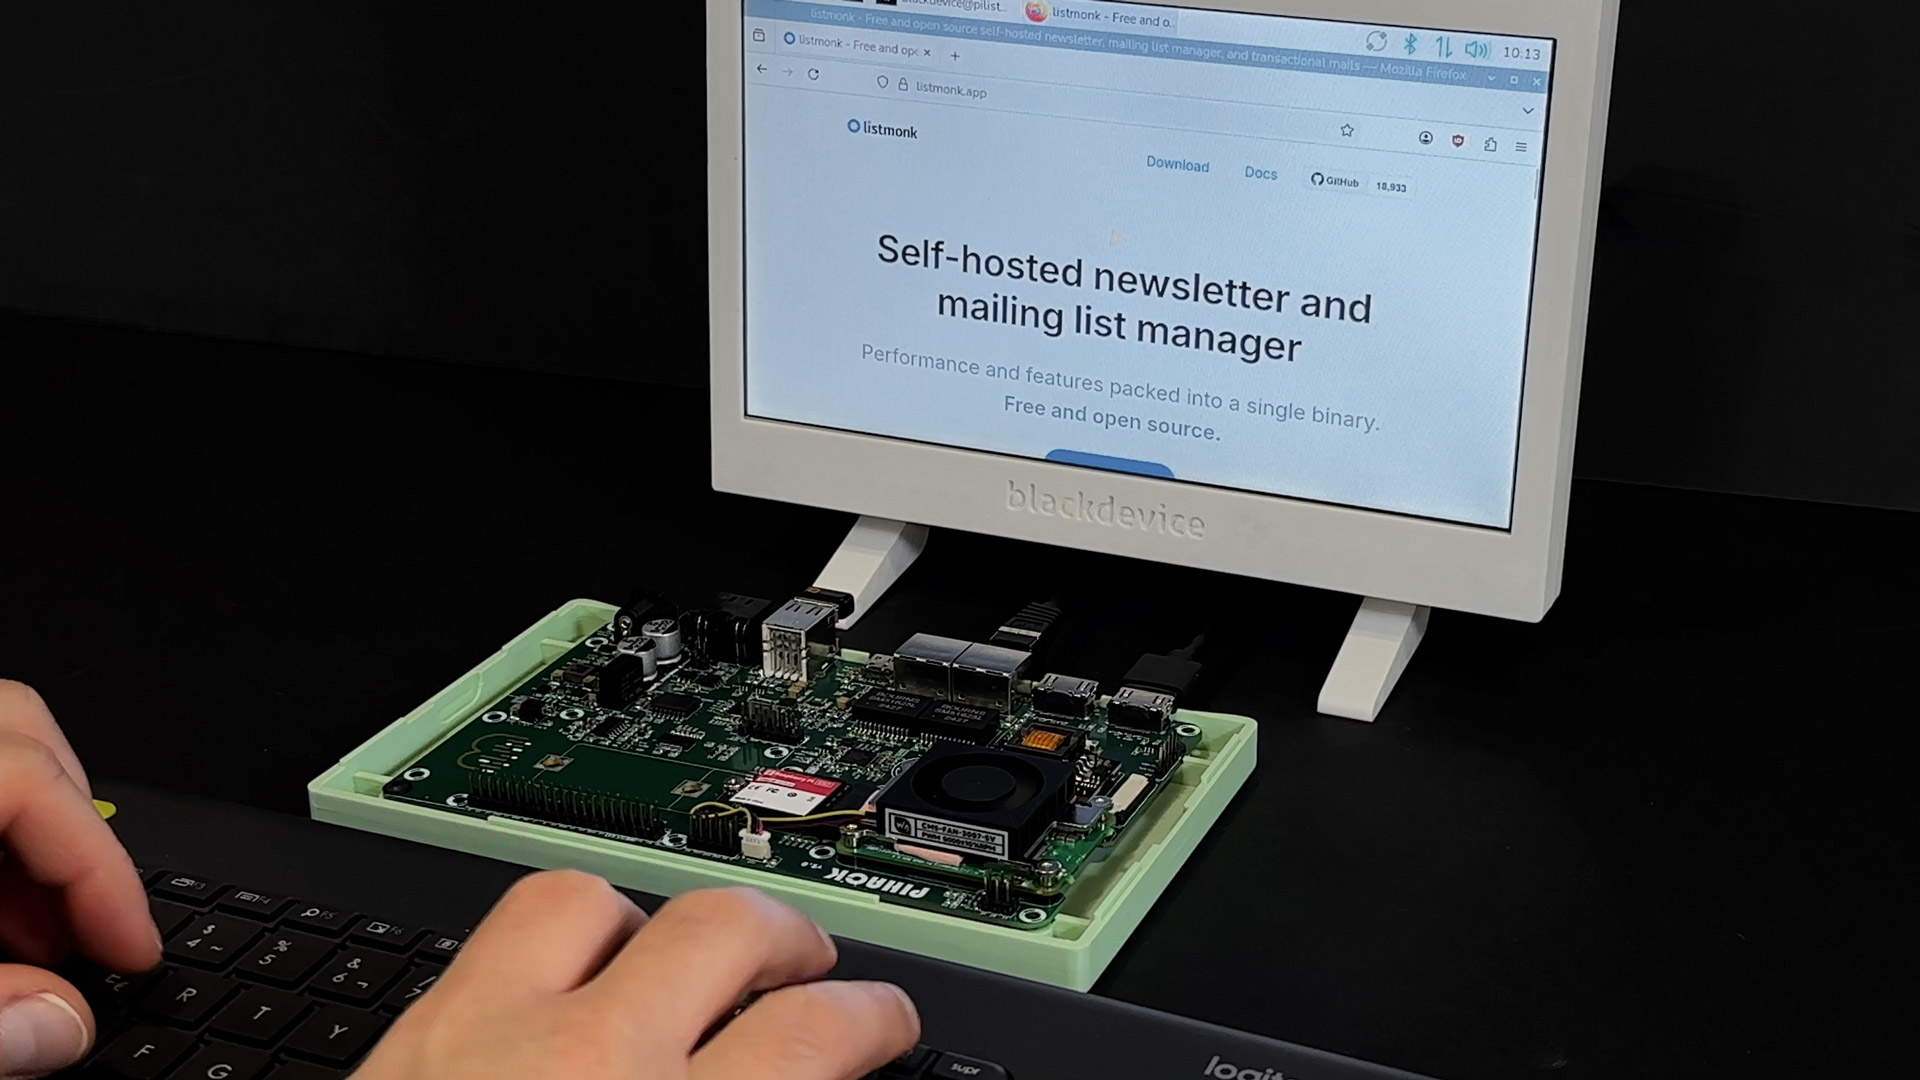
How to self-host a newsletter server on Raspberry Pi with Listmonk and Docker
Managing newsletters and mailing lists doesn’t have to rely on third-party SaaS platforms with escalating monthly subscriptions, subscriber caps, or opaque privacy terms. When we decided to launch our own hardware projects and manage the early bird backers for Hive, we chose not to rent infrastructure from Mailchimp or HubSpot. We deployed Listmonk.
Listmonk is a blazingly fast, standalone newsletter and mailing list manager written in Go, backed by a PostgreSQL database. In this guide, we walk you step by step through configuring, securing, and operating Listmonk in a containerized environment on a Raspberry Pi (Pi 4, Pi 5, or a Compute Module carrier board).
Many beginners assume that self-hosting a newsletter server means turning their home IP into a mail transfer agent (MTA). Do not do this. Residential internet providers block outbound port 25 to prevent spam, and residential IP ranges are permanently blacklisted by Gmail, Outlook, and Yahoo.Listmonk handles subscriber lists, opt-ins, campaign templates, tracking, and rate limiting—while offloading the actual mail delivery to a dedicated, high-reputation SMTP relay (such as Amazon SES, Brevo, Postmark, or Resend). This setup gives you 100% data sovereignty at fractions of a cent per email.
Why choose Listmonk for edge hardware?
Unlike bloated PHP-based solutions or cloud tools, Listmonk is packed into a single compiled Go binary. On an ARM64 architecture like Raspberry Pi OS 64-bit:
- Minimal resource footprint: The Listmonk container consumes under 50 MB of RAM while idle, and PostgreSQL consumes approximately 60–80 MB.
- High-throughput concurrency: It can dispatch thousands of transactional emails per minute via multi-threaded worker pools without choking the Pi’s CPU.
- Total privacy and compliance: Your user lists, analytics, and unsubscribes stay entirely on your disk, meeting strict GDPR and data protection requirements.
Hardware and initial requirements
- Device: Raspberry Pi 4, Raspberry Pi 5, or Compute Module 4/5 (2GB RAM minimum is plenty).
- Operating system: Raspberry Pi OS Lite (64-bit) recommended.
- Storage: High-endurance microSD or NVMe SSD (recommended for fast database writes).
- Static IP: A reserved local IP address configured in your router or via
dhcpcd.conf/ NetworkManager.
Step 1. Prepare Docker and Docker Compose
Before installing containers, update your host packages:
sudo apt update && sudo apt full-upgrade -y
Because Listmonk requires a companion PostgreSQL service, deploying via Docker Compose keeps the installation clean, isolated, and simple to back up. If you don’t have Docker installed yet, execute the official convenience script:
curl -fsSL https://get.docker.com -o get-docker.sh && sudo sh get-docker.sh
sudo usermod -aG docker $USER
(Log out and log back in or reboot for user group permissions to take effect).
Step 2. Project structure and environment credentials
Create a dedicated directory for Listmonk and enter it:
mkdir -p ~/listmonk && cd ~/listmonk
Next, create a .env file to hold your database passwords and initial administrative credentials:
nano .env
Paste the following environment variables (make sure to replace the placeholder passwords with strong, unique strings):
POSTGRES_USER=listmonk
POSTGRES_PASSWORD=generate_a_secure_db_password
POSTGRES_DB=listmonk
LISTMONK_ADMIN_USER=admin
LISTMONK_ADMIN_PASSWORD=generate_a_secure_admin_password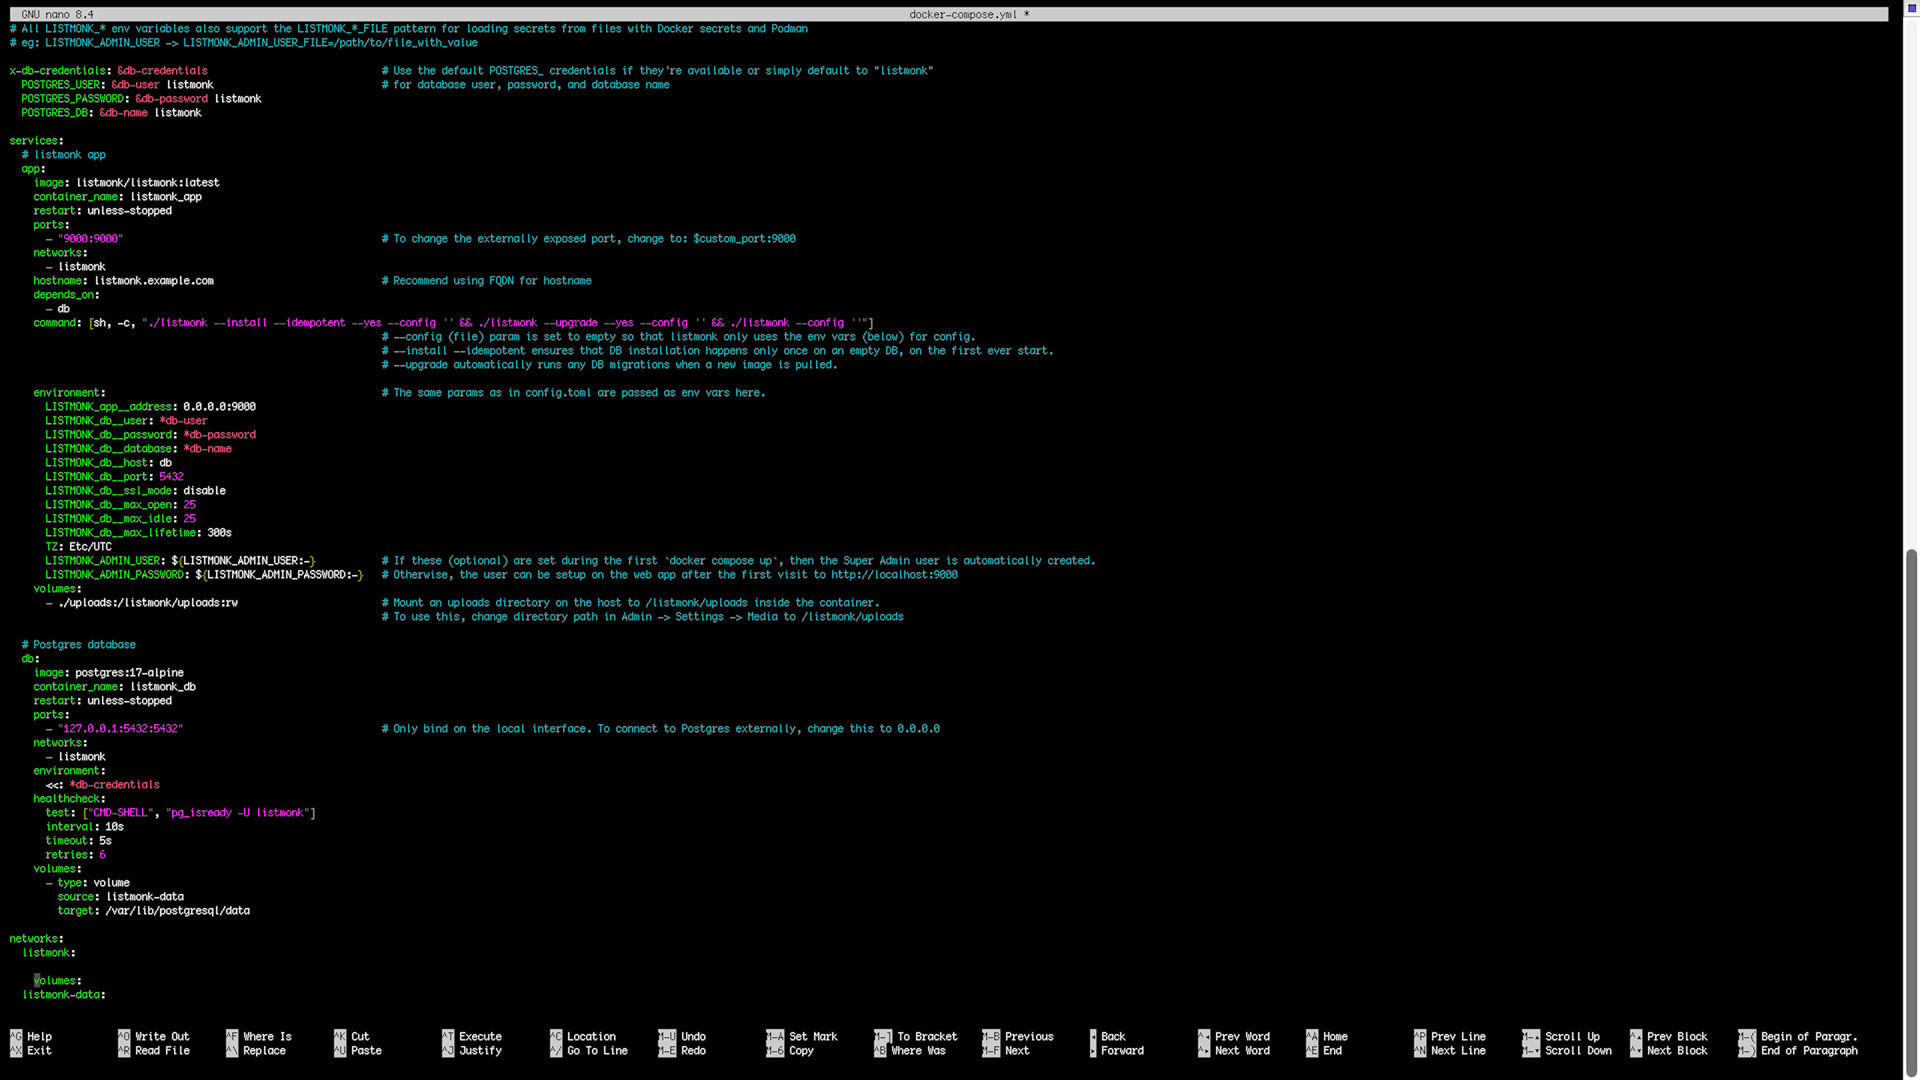
Step 3. The Docker Compose configuration
Download the official compose manifest or create your own docker-compose.yml file:
nano docker-compose.yml
Insert the following hardened compose configuration:
version: "3.8"

services:
  db:
    image: postgres:15-alpine
    restart: unless-stopped
    environment:
      POSTGRES_USER: ${POSTGRES_USER}
      POSTGRES_PASSWORD: ${POSTGRES_PASSWORD}
      POSTGRES_DB: ${POSTGRES_DB}
    volumes:
      - db_data:/var/lib/postgresql/data
    healthcheck:
      test: ["CMD-SHELL", "pg_isready -U ${POSTGRES_USER}"]
      interval: 10s
      timeout: 5s
      retries: 5

  app:
    image: listmonk/listmonk:latest
    restart: unless-stopped
    depends_on:
      db:
        condition: service_healthy
    ports:
      - "9000:9000"
    environment:
      LISTMONK_db__host: db
      LISTMONK_db__user: ${POSTGRES_USER}
      LISTMONK_db__password: ${POSTGRES_PASSWORD}
      LISTMONK_db__database: ${POSTGRES_DB}
      LISTMONK_app__address: "0.0.0.0:9000"
      LISTMONK_app__admin_username: ${LISTMONK_ADMIN_USER}
      LISTMONK_app__admin_password: ${LISTMONK_ADMIN_PASSWORD}
    volumes:
      - uploads:/listmonk/uploads
    command: ["sh", "-c", "./listmonk --install --idempotent --yes && ./listmonk --upgrade --yes && ./listmonk"]

volumes:
  db_data:
  uploads:
Key details in this setup:
postgres:15-alpineprovides a featherweight PostgreSQL engine compatible with 64-bit ARM.- The
healthcheckensures Listmonk never attempts to migrate before the database daemon is fully awake. - The
--idempotentflag in the entry command permits clean database initialization on the very first boot without wiping your data on subsequent container restarts.
Step 4. Booting the stack
Launch the containers in detached mode:
docker compose up -d
Check the container logs to ensure database migrations executed properly:
docker compose logs -f app
Once you see the output indicating that Listmonk is listening on port 9000, open your web browser and navigate to:
http://YOUR_PI_IP:9000
Log in using the administrator credentials configured in your .env file.
Step 5. Resolving the admin credential security warning
Upon initial login, Listmonk displays a warning advising you to remove the admin credentials from configuration files or environment variables. This is an intentional security measure: once the admin user is created inside PostgreSQL, leaving hardcoded passwords inside .env or docker-compose.yml presents an unnecessary security risk.
- Verify that your admin user exists under Settings → Users.
- Edit your
.envfile and comment out or remove the following lines:# LISTMONK_ADMIN_USER=admin # LISTMONK_ADMIN_PASSWORD=... - Restart your containers:
docker compose restart app
Refresh the dashboard. The warning is dismissed, and your authentication remains securely stored inside the encrypted database.
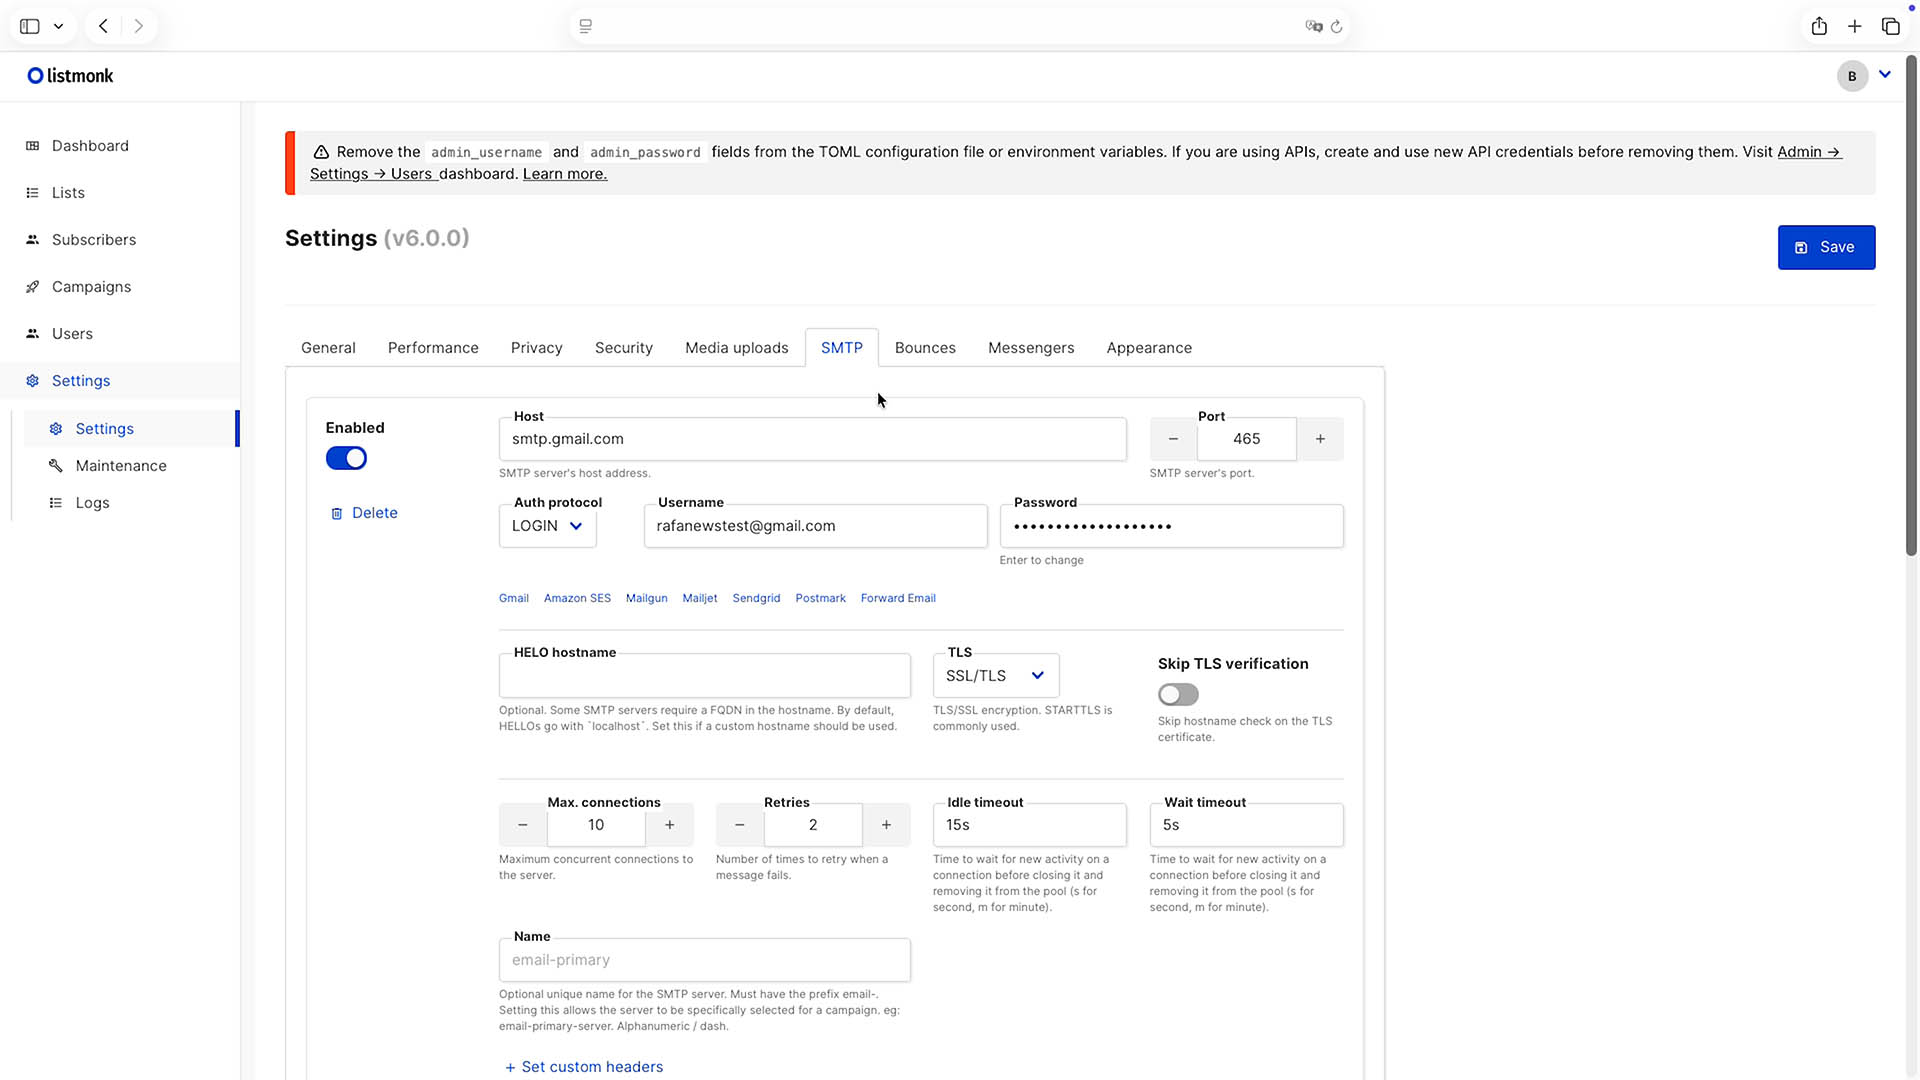
Configuring SMTP relay and outbound deliverability
To deliver real emails to inboxes (and not the spam folder), point Listmonk to an external relay under Settings → SMTP:
- Host and port: E.g.,
smtp.sendgrid.neton port587(STARTTLS) or465(SSL/TLS). - Auth: Username and API key provided by your relay.
- Concurrency / Rate limit: You can define batch sizes (e.g., 25 emails per batch) and worker pools to comply with your provider’s sending rate limits.
No matter how good your server is, if your domain lacks TXT records, email providers will drop your messages. Always configure:
- SPF (Sender Policy Framework): Authorizes your SMTP provider to send mail on behalf of your domain.
- DKIM (DomainKeys Identified Mail): Signs each email with a cryptographic key matching your public DNS record.
- DMARC: Specifies policy enforcement and sends bounce reporting.
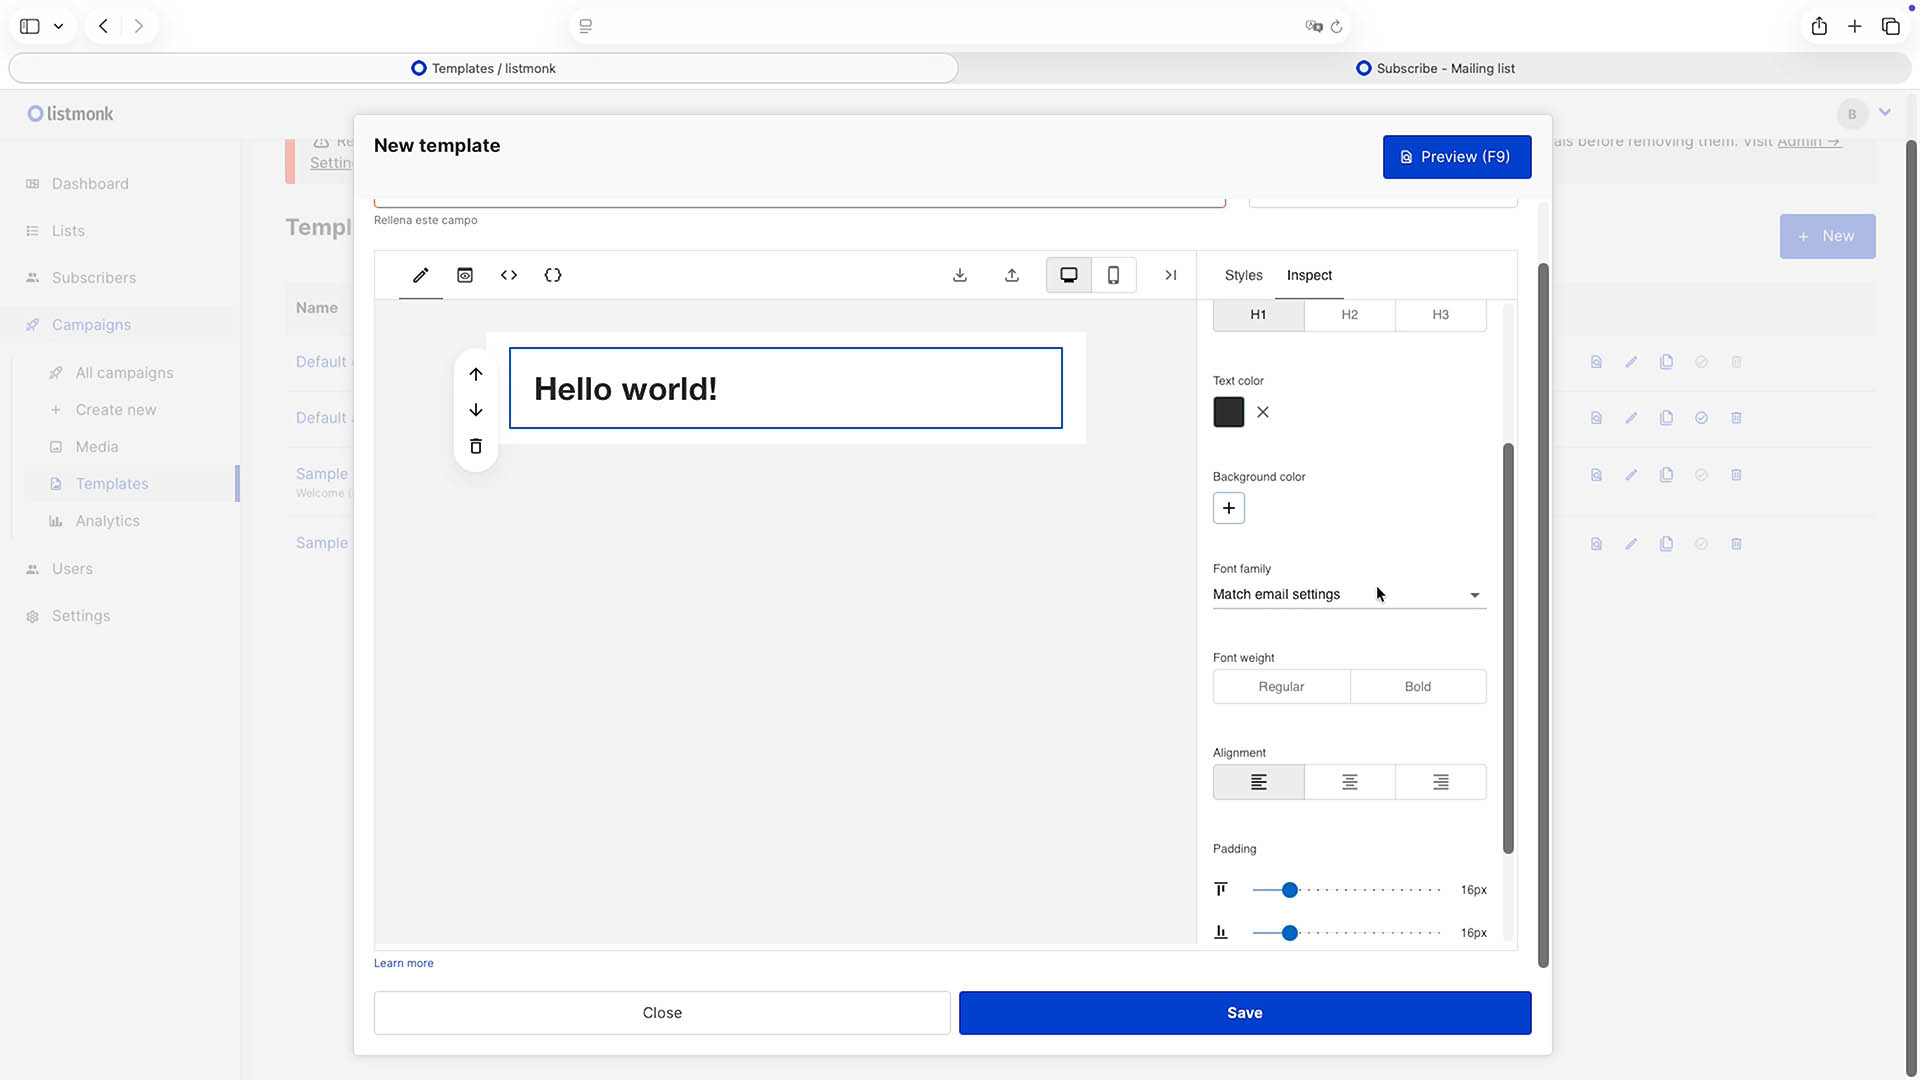
Designing campaigns and managing subscription forms
Listmonk features a visual template manager and full support for raw HTML. You can create public lists (e.g., for hardware announcements) and private lists for internal notifications. Each list provides:
- Custom opt-in confirmation emails (Double Opt-In).
- A standalone subscription URL and clean embeddable HTML forms.
- API webhooks for integration with static websites, WordPress, or e-commerce backends.
We don’t just write tutorials about self-hosting; we depend on it every day. When we opened the early bird campaign for Hive, our modular compute system for Raspberry Pi CM5, every signup form on hive.blackdevice.com was connected directly to our own Listmonk instance.Managing our backer list in-house saved us hundreds of dollars in SaaS tiers while giving us sub-second API responses and 100% control over backer privacy. → Check out Hive and join our list to see it in action!
Video walkthrough: See the complete setup in action
If you prefer a visual guide, we recorded our lab setup showing the entire process, including container provisioning and dashboard navigation:
Conclusion
Self-hosting your newsletter platform on a Raspberry Pi is one of the most rewarding home-lab projects you can deploy. By pairing Listmonk’s hyper-efficient Go backend with an established SMTP provider, you get the best of both worlds: complete data privacy on your own hardware without sacrificing deliverability.
For reverse proxy configurations (using Nginx or Caddy with automated Let’s Encrypt TLS certificates) and database backup automation, explore the official Listmonk documentation.
If you enjoy practical hardware guides and self-hosted infrastructure, visit our blog, check out our projects on our YouTube channel, or join our community newsletter powered directly by our own setup.
Subscribe to the blackdevice newsletter
Join the community and get the latest from us, tech news and maker content.
You’ll receive a confirmation email. Please check your spam folder if you don’t see it.
Project updates & launches · DIY guides and tutorials · maker content. No spam. Leave anytime.