How to install and run DeepSeek R-1 on a Raspberry Pi 5. Step by step guide
Large Language Models (LLMs) have become part of our everyday lives. From writing emails and generating creative ideas to summarizing documents, they’re everywhere. But these impressive systems typically require huge data centers, power-hungry GPUs, and energy-intensive environments.
DeepSeek, an open-source LLM project, offers several lightweight versions of its R1 model — some of which are optimized to run on modest hardware. That’s where the Raspberry Pi 5 comes in.
How far can a Raspberry Pi 5 go with local DeepSeek AI models?
In this project, we’ll install, run and test lightweight variants of the DeepSeek R-1 model on a Raspberry Pi 5. With its 2.4 GHz ARM processor and 8 GB RAM, our Pi 5 is a compact but surprisingly capable machine. We’ll walk through setting up the environment, installing the models, and running real queries — all locally.
What you’ll need
- Raspberry Pi 5 (we’ll be using the 8 Gb model)
- microSD card & card reader
- Power supply (5 V ⎓ 3 A)
- Host computer (for imaging)
- HDMI monitor, keyboard, and cables
- Internet connection (Wi-Fi or ethernet)
Step 1: prepare your Raspberry Pi
Start by flashing the Raspberry Pi OS onto the MicroSD card. Using the Raspberry Pi Imager, select the OS version, your device, storage and pre-configure:
- Hostname
- Username & password
- Wi-Fi credentials
- Enable SSH
Once flashed, insert the MicroSD into your Pi and power it up. Wait for boot and wi-fi connection and then open an SSH terminal.
Update the system
Check that everything is up to date by running the following commands:
sudo apt update
sudo apt upgrade -y
Ensure curl is installed
sudo apt install curl
Note: Curl allows your Pi to interact with APIs and download files — we’ll need it to install Ollama.
Step 2: install Ollama
Ollama is a command-line tool that simplifies running LLMs locally — perfect for our Pi setup.
Install it with:
curl -fsSL https://ollama.com/install.sh | sh
Once finished, you’re ready to run DeepSeek models directly from your Raspberry Pi.
Step 3: testing DeepSeek R1 models
DeepSeek offers multiple lightweight model sizes. We’ll focus on those that can run on 8 GB of RAM.
Available models
1.5b– 1.500 million parameters7b– 7.000 million parameters8b– 8.000 million parameters14b– 14.000 million parameters
Note: For context, GPT-4 and DeepSeek V3 scale models run with 600.000 million parameters, far beyond our Pi’s capacity. But these smaller ones are still very usable.
DeepSeek R1: model performance & results on Raspberry Pi 5
To evaluate how each DeepSeek R1 model performs on the Raspberry Pi 5, we ran two reference queries on every model we could install locally:
Reference prompts
- List three milestones in space exploration, chronologically.
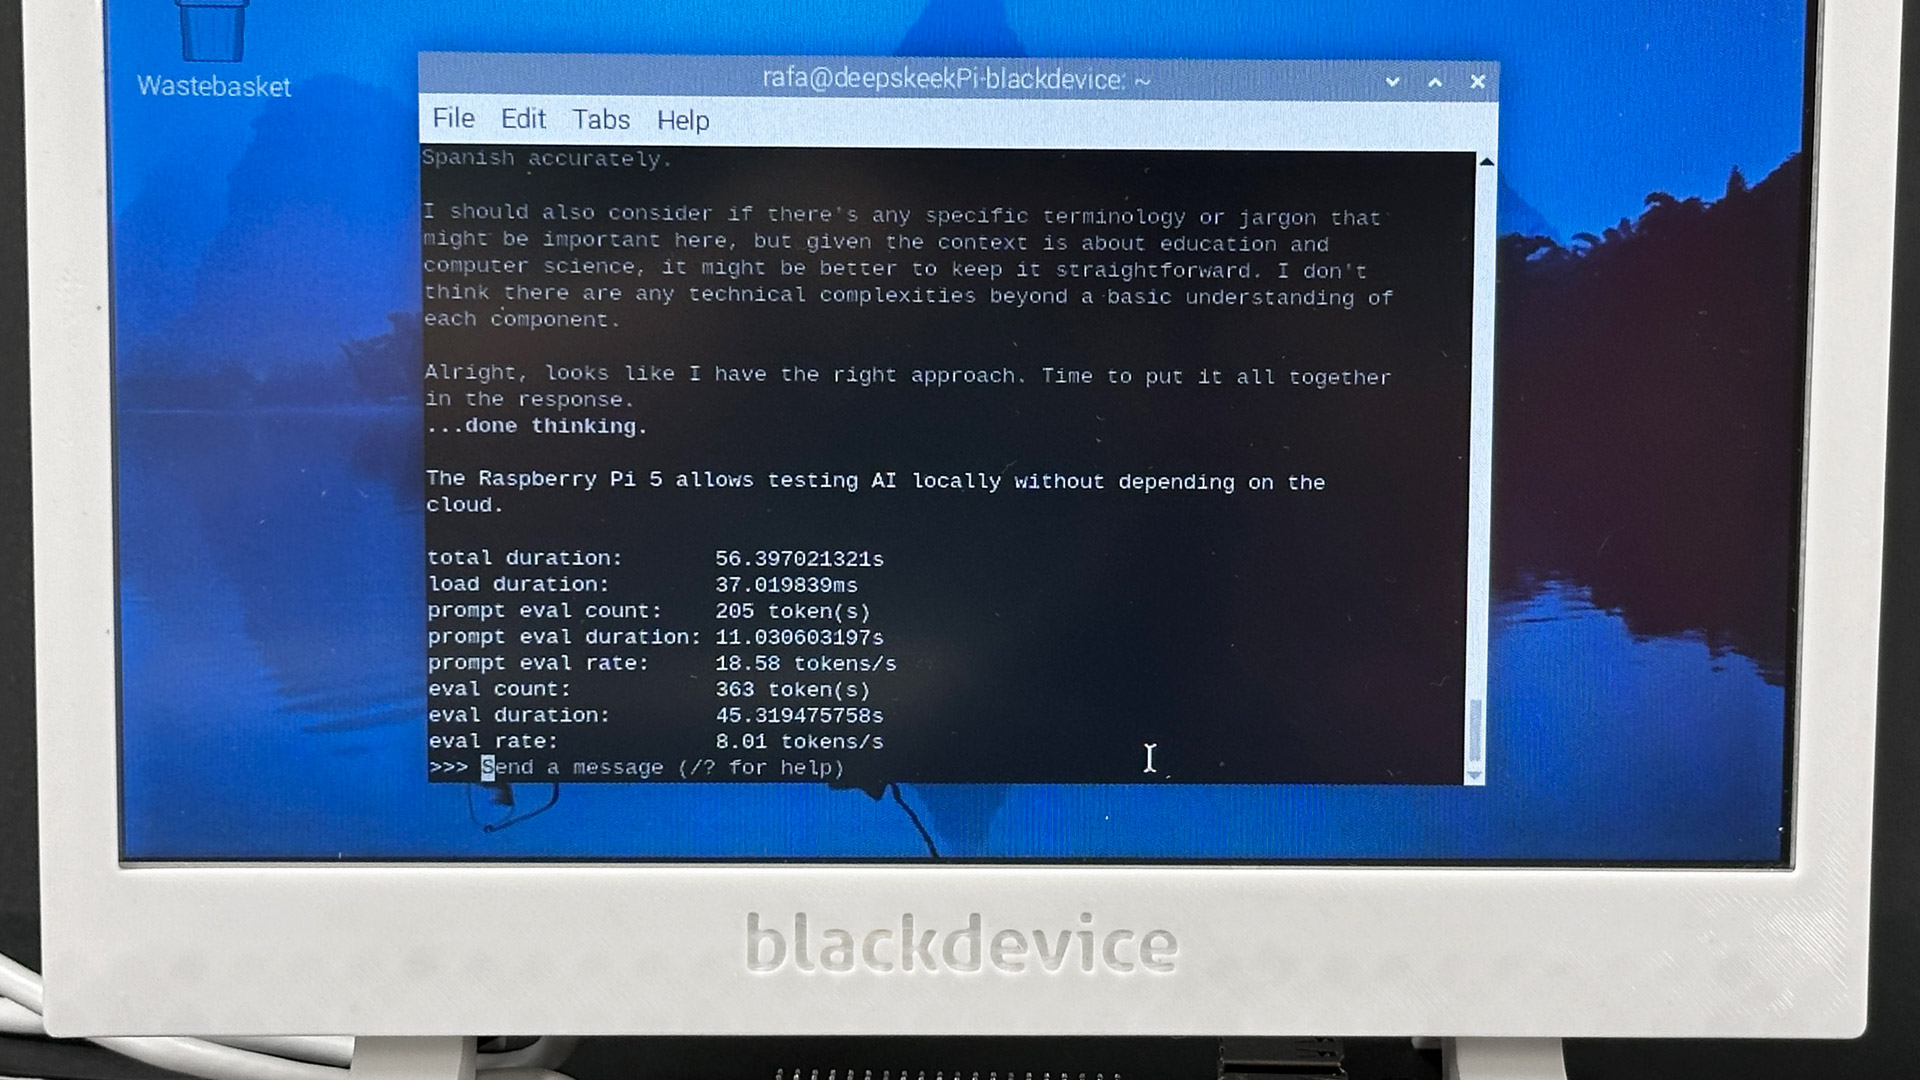
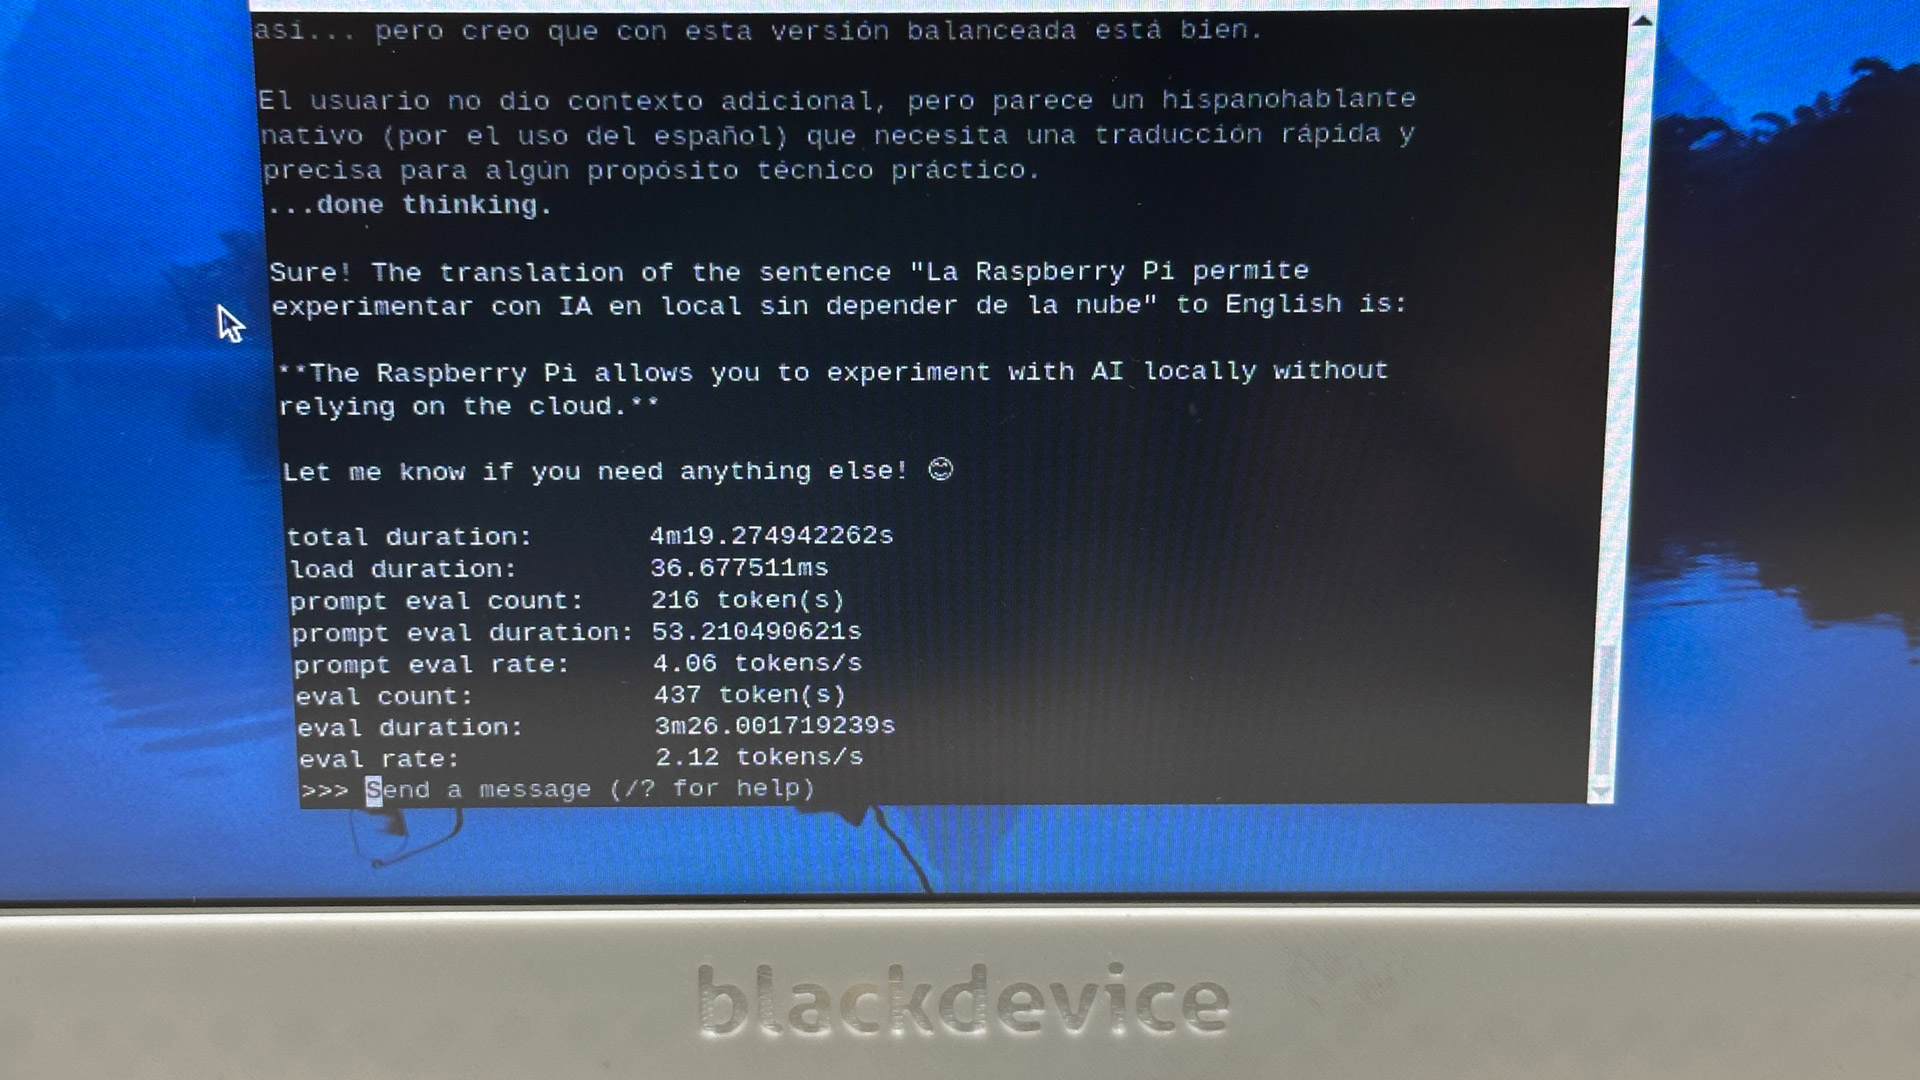
- Translate the following sentence into English: «La Raspberry Pi 5 permite experimentar con IA en local sin depender de la nube.»
When running any DeepSeek R1 model using Ollama, you can optionally add the –verbose flag at the end of your command.
for example: ollama run deepseek-r1:1.5b --verbose
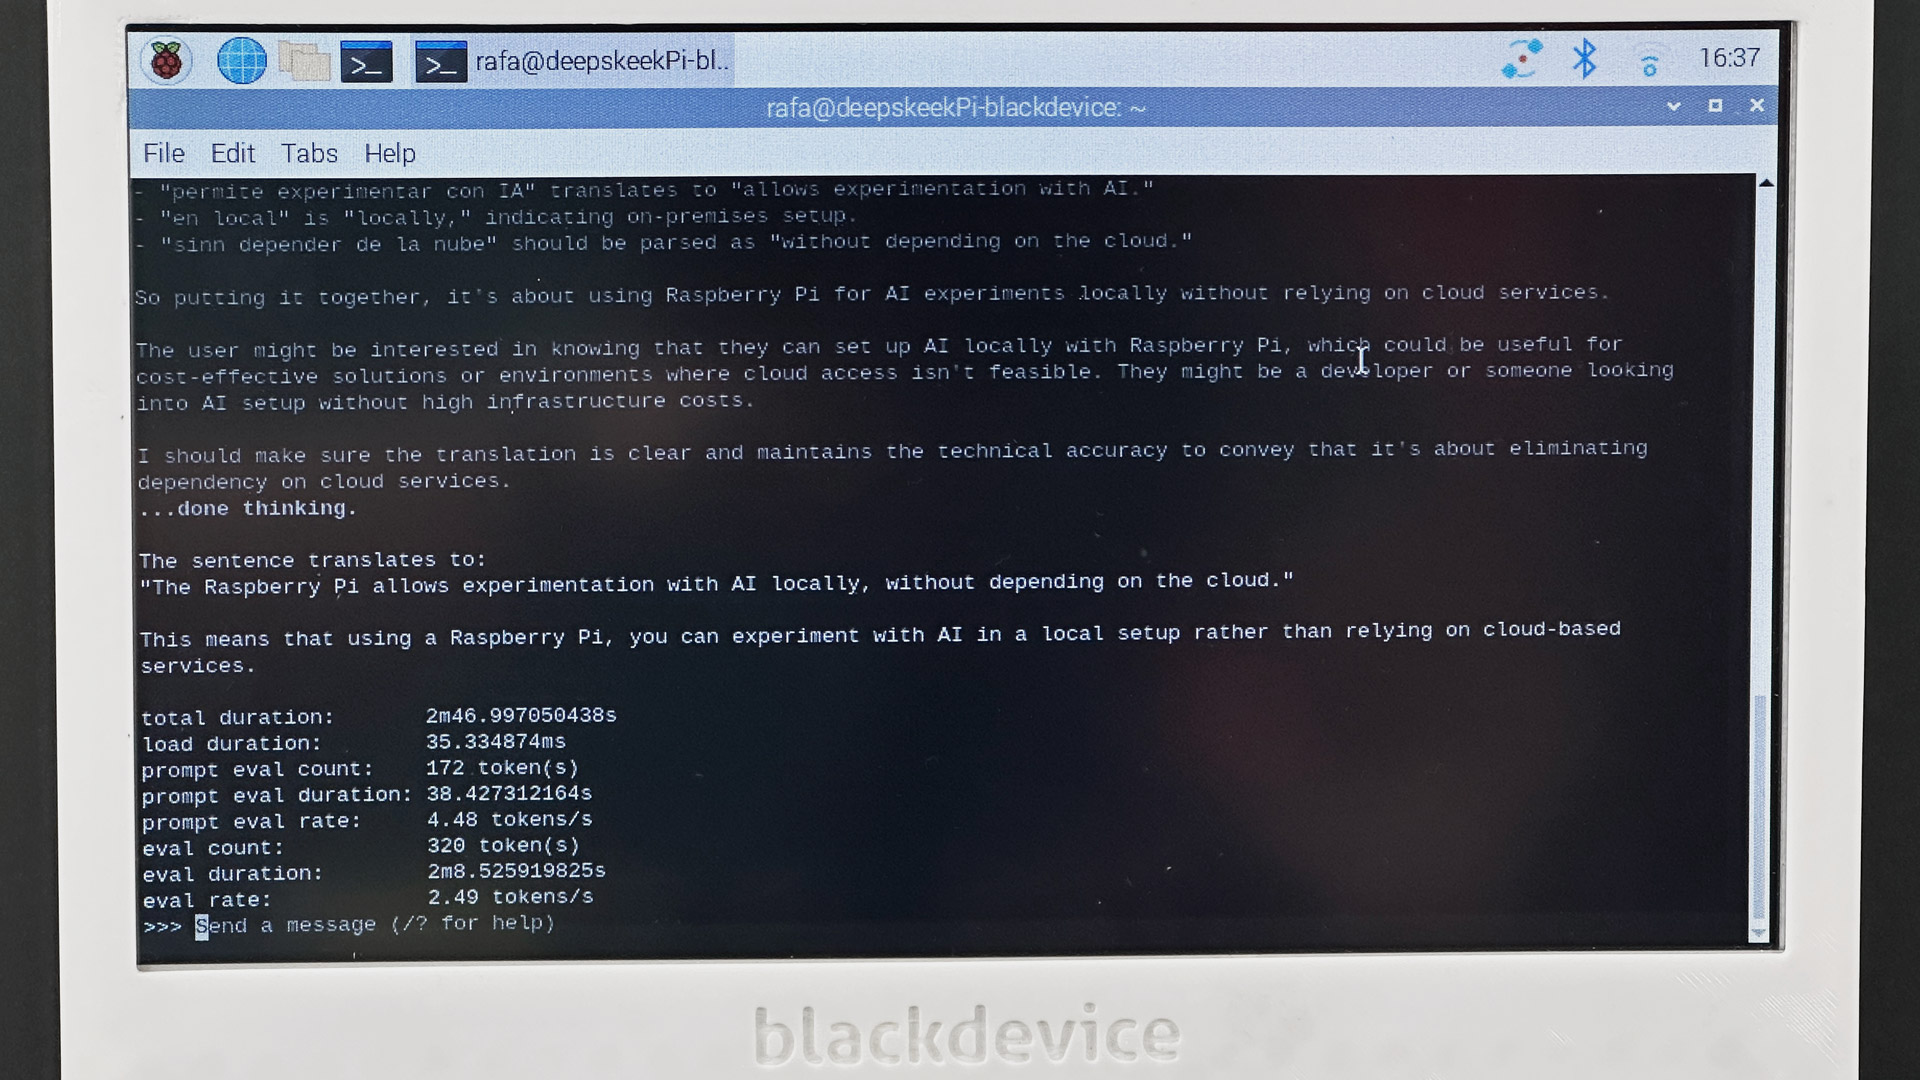
This enables detailed output after the model responds to your prompt. Specifically, it gives you additional statistics and performance metrics, such as:
- Load time.
- Prompt processing time.
- Total response generation time.
- Token count (how many tokens were used to understand your input and generate the output).
- Memory usage estimates.
These metrics are extremely useful if you want to analyze and compare how different models perform on your Raspberry Pi 5. For example, you can see how much slower the 7b model is compared to the 1.5b, or check how efficiently your Pi handles larger models.
1. DeepSeek R1 — 1.5b
Run the command:
ollama run deepseek-r1:1.5b --verbose
and wait until the download is complete
- Download size: ~1 Gb
- Speed:fast — process and response in under 60 seconds.
- Memory usage: Low
- Result:
- The translation was accurate.
- The space exploration answer wasn’t good. It included a factual error — it gave the wrong date for the Curiosity Mars mission and a hallucinated second milestone.
Reflection: This version is surprisingly usable for basic tasks. While it’s not reliable for reasoning or factual accuracy in more complex questions, it’s perfect for fast translations, summarizations or local experimentation. It’s also very responsive and easy on system resources — ideal for casual testing and basic usage.
2. DeepSeek R1 — 7b
Run the command:
ollama run deepseek-r1:7b --verbose
and wait until the download is complete.For faster download we recommend you use ethernet instead of Wi-fi.
- Download size: ~4.7 Gb
- Speed: Noticeably slower — one word per second
- Memory Usage: High
- Result:
- The translation was correct and natural.
- The space exploration answer improved in depth but still contained a common factual mistake — it listed the wrong name as the first person on the Moon.
Reflection: This model provides richer language and more structured answers, but it’s still not fully reliable for factual detail. For simple tasks, the slower response time isn’t justified compared to 1.5b. Still, it’s a noticeable step up in terms of reasoning quality and text coherence.
3. DeepSeek R1 — 8b
Run the command
ollama run deepseek-r1:8b --verbose
and wait until the download is complete
- Download size: ~5.2 Gb
- Speed: Similar to 7b
- Memory Usage: Very high (near limit of 8 GB)
- Result:
- The translation was excellent — natural, fluent, and accurate.
- The space exploration answer was factually correct, well-structured, and clearly written.
Reflection: This is the most capable model that fits within the Pi 5’s 8 GB RAM. It delivers reliable answers, performs better in factual accuracy, and has a polished output style. While it’s slower than 1.5b, the quality gains are significant and worth it for more serious tasks.
4. DeepSeek R1 — 14b
Run the command
ollama run deepseek-r1:14b --verbose
and wait until the download is complete
- Download size: ~9 Gb
- Result: Failed to run — memory error.
Reflection: This model exceeds the memory capacity of the Pi 5 with 8 GB RAM. You’d need the 16 GB version or a more powerful ARM-based device to test it. It’s a reminder of how resource-intensive these models can become as parameter count scales.
Below is a summary table comparing the different DeepSeek R1 models we tested on the Raspberry Pi 5. It includes key data from our experiments such as model size, load time, response speed, and output quality. This can help you decide which version is best suited for your use case or hardware limitations.
| Model | Parameters | Download Size | Load Time | Response Speed | Answer Quality | Notes |
|---|---|---|---|---|---|---|
| DeepSeek R1 1.5b | 1.5B | ~1 GB | Fast | < 1 min total | Mixed — good translation, factual errors | Fastest, usable for simple tasks |
| DeepSeek R1 7b | 7B | ~4.7 GB | Moderate | Slower — ~1 word/sec | Better accuracy, still minor mistakes | Much slower, higher RAM usage |
| DeepSeek R1 8b | 8B | ~5.2 GB | Similar to 7b | Slow | Accurate and natural | Best balance of quality on Pi 5 |
| DeepSeek R1 14b | 14B | ~9 GB | Not loaded | N/A | N/A | Not supported — exceeds 8 GB RAM |
Conclusion: what can the Raspberry Pi 5 really do?
Despite being a small ARM-based device not built for AI workloads, the Raspberry Pi 5 can handle smaller versions of DeepSeek R1 surprisingly well. While it won’t rival cloud-scale models, it’s a fantastic playground for local experimentation, learning, and light AI tasks like translation or basic summarization, but these lightweight models are not reliable with facts or reasoning and tend to hallucinate.
Thanks to tools like Ollama, and the ARM-compatible builds of DeepSeek, we can now experiment with local AI without needing cloud access.
And remember — thanks to Raspberry Pi Connect, you can access your Pi remotely from any device. That means you can leave your Raspberry Pi 5 running DeepSeek and interact with it from anywhere, without needing a monitor or keyboard. Just connect via SSH or use the Pi Connect interface and start prompting your local AI assistant anytime, from anywhere. If you’re curious how to set that up, check our previous How to control your Raspberry Pi remotely post.
Did you enjoy this project?
Subscribe to our newsletter for more DIY tech projects and Raspberry Pi experiments and join our YouTube channel where we break down these builds step-by-step!