
How to turn your Raspberry Pi into a full WordPress web server
Your Raspberry Pi is not just a tiny computer for experiments—it is powerful enough to work as a fully functional web server capable of hosting and running a WordPress website. Whether you want to build a personal site, a portfolio, or a small business website, the Raspberry Pi 5 or the Compute Module 5 gives you complete control without relying on hosting companies.
In this article, we walk step by step through everything you need to set up a complete web server on your Raspberry Pi device, using Apache, MariaDB, PHP, and WordPress. The process requires no prior experience in programming or server administration, making it perfect for beginners and makers.
Why use a Raspberry Pi as a WordPress web server?
The Raspberry Pi 5 and the Compute Module 5 includes a faster CPU, more RAM, and upgraded I/O performance, making it ideal for small websites.
Some benefits are:
- Low cost — no monthly hosting fees.
- Full control over your server and data.
- Low power usage (perfect 24/7 home server).
- Great performance for personal or small business websites.
- Easy to upgrade and experiment with.
Using an SSD makes your server significantly faster, more stable, and more reliable than using a microSD card or an eMMC. Cooling your Pi with a fan ensures optimal performance during continuous operation.
What we will use for this project
To build our WordPress web server, we’ll be using a Raspberry Pi Compute Module 5 mounted on a custom board we developed in-house to make the most out of this specific SoM computer. The OS will run from the CM5’s eMMC, but the entire web server will be hosted on the external SSD. We will use an official Raspberry Pi SSD with 256 GB capacity.
This project can also be done exactly the same way using a standard Raspberry Pi 5 with an SSD Kit.
Hardware used:
- Raspberry Pi 5 or Compute Module 5 (we used the 8 Gb version)
- Official Raspberry Pi SSD with 256 Gb storage
- Active cooler or fan
- Power supply
- Keyboard, mouse and monitor (for initial setup)
- HDMI cable
- Internet connection (Ethernet recommended for stability)
Step 1: install the Raspberry Pi OS (Lite)
The operating system will run from the Compute Module 5 eMMC, while the entire web server will later be installed on the external SSD.
If you’re using a Raspberry Pi 5 instead of the CM5, the installation is much easier (explained at the end of this section).
Installing Raspberry Pi OS on the CM5 eMMC (macOS)
To flash Raspberry Pi OS onto the Compute Module 5 eMMC using macOS, follow these steps:
1. Build the RPI Boot binary
Open your macOS terminal and clone the official usbboot tool:
git clone --recurse-submodules --shallow-submodules --depth=1 https://github.com/raspberrypi/usbboot

cd usbboot
Install required packages:
brew install libusb

brew install pkg-config
Build the tool:
make
2. Start the RPI boot process
Run the rpiboot command:
sudo ./rpiboot
You will see the message:
“Waiting for BCM2835/6/7/2711/2712…”
At this moment, connect your Compute Module 5 custom or IO board to your Mac via USB and then power
Ensure you are holding the USB BOOT button (or have placed the boot jumper) on your IO board before powering it on.
- The LED on the IO board will light up when the bootloader is flashed
- When the green light stays on, the eMMC will appear on your Mac as a storage device
If these steps don’t work, refer to this Jeff Geerling’s guide.
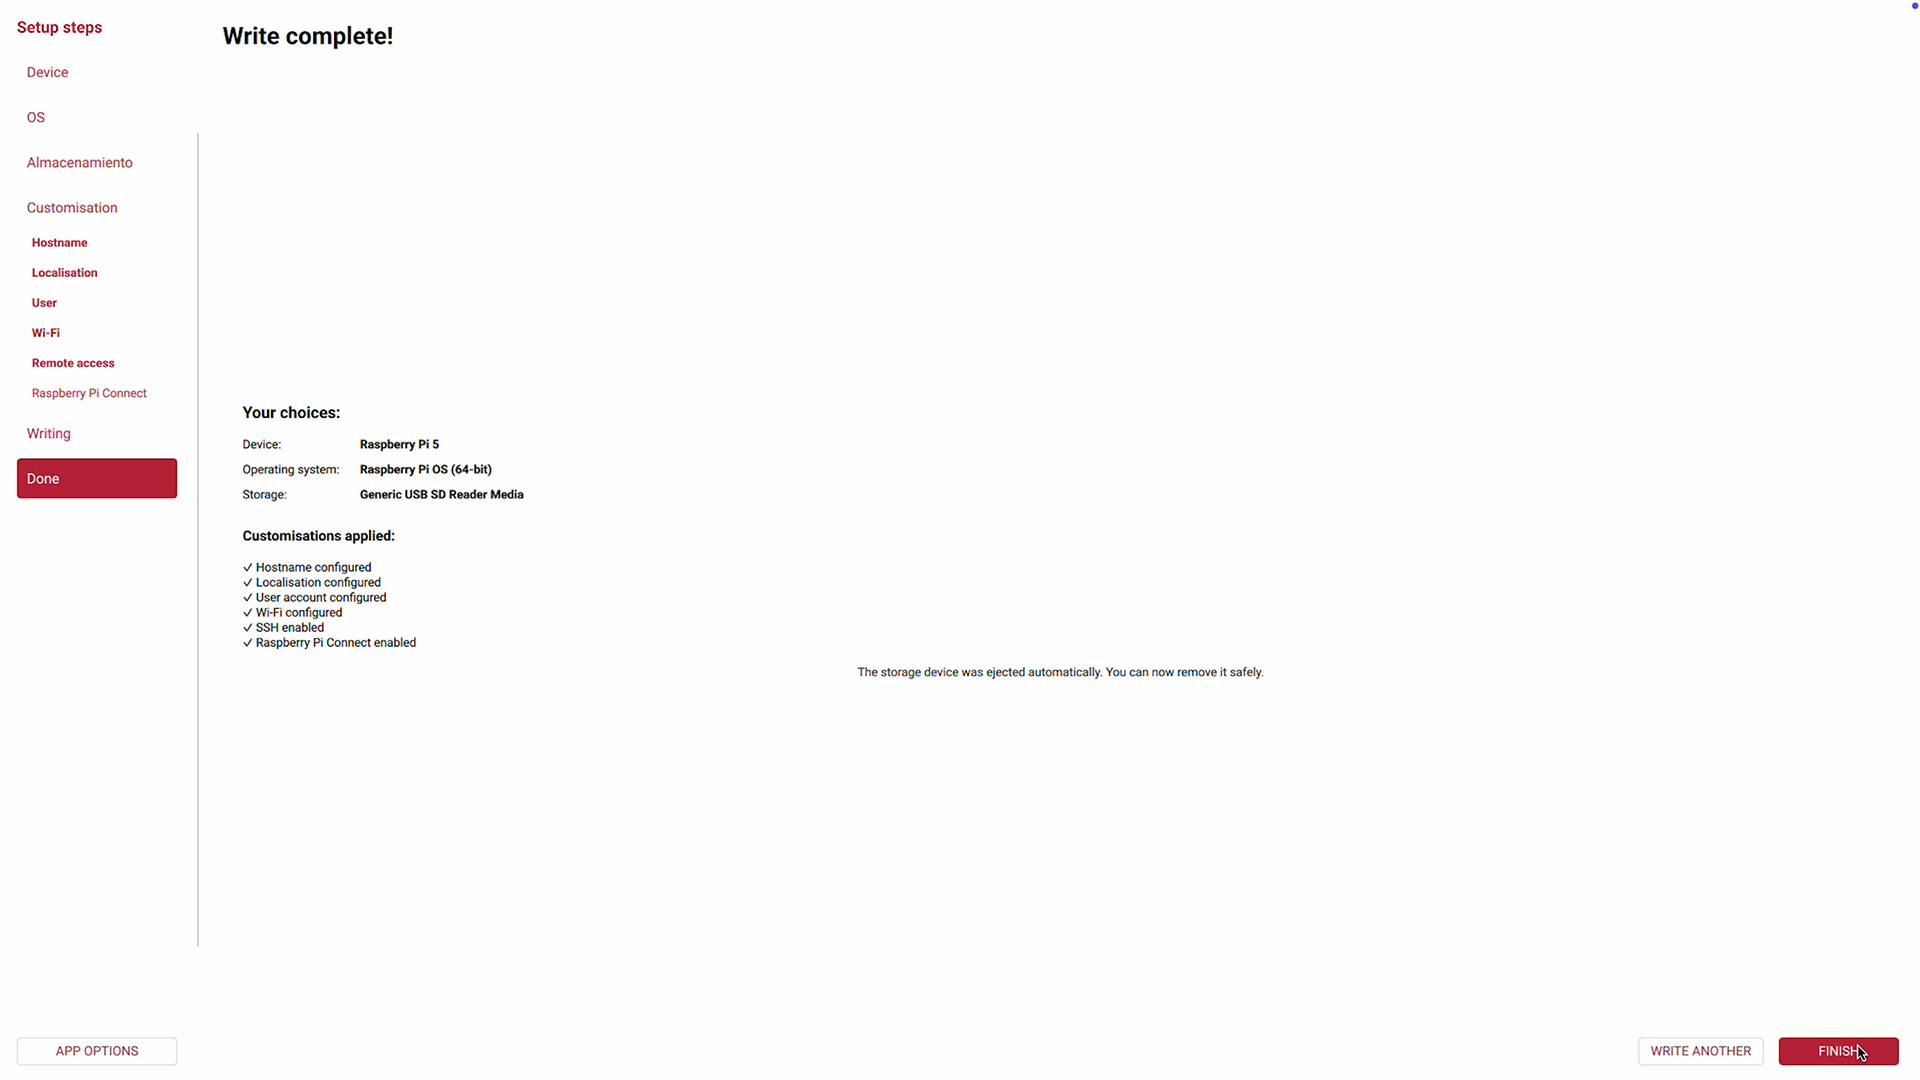
3. Flash Raspberry Pi OS to the eMMC
- Open Raspberry Pi Imager
- Choose Raspberry Pi OS (64-bit)
- Select the newly mounted eMMC drive
- Click Next and write the OS
When the process finishes, eject the drive, connect your board to the power source, monitor, keyboard and let the install process finish.
You will now be inside a clean Raspberry Pi OS Lite environment running directly from eMMC.
If you’re using a Raspberry Pi 5 instead of CM5
The process is significantly simpler:
- Open Raspberry Pi Imager
- Choose Raspberry Pi OS Lite (64-bit)
- Flash it to a microSD card
- Insert the microSD into the Raspberry Pi 5
- Power it on
The Pi will boot immediately and is ready for the next steps.
Step 2: Prepare and mount the SSD for server storage
First, identify your SSD:
lsblk
You should see a device like nvme0n1
Now format it (ONLY if it’s empty):
sudo mkfs.ext4 /dev/nvme0n1
Create a mount point:
sudo mkdir -p /mnt/ssd
Mount it temporarily:
sudo mount /dev/nvme0n1 /mnt/ssd
Make it permanent:
sudo nano /etc/fstab
Add this line:
/dev/nvme0n1 /mnt/ssd ext4 defaults,noatime 0 2
Save and reboot:
sudo reboot
Your SSD is now mounted at /mnt/ssd and ready to store the WordPress server.
Step 3: Find your Raspberry Pi’s IP address and enable remote access
To work comfortably from your main computer, connect to the Pi remotely. On the Raspberry Pi, run:
hostname -I
This shows the device’s local IP address (e.g. 192.168.1.50).
From your computer, connect via SSH:
ssh yourPiuser@YOUR_PI_IP
Update the OS
Note: always update before installing server software:
sudo apt update
sudo apt full-upgrade -y
Assign a static IP address
A web server must maintain a fixed IP inside your local network.
Edit the network configuration file:
sudo nano /etc/dhcpcd.conf
Add at the bottom (adjust the addresses to match your network):
interface eth0

static ip_address=192.168.1.50/24

static routers=192.168.1.1

static domain_name_servers=192.168.1.1 8.8.8.8
Save and reboot your Pi:
sudo reboot
Note: Once it reboots, you’ll need to SSH back.
Step 4: install the LAMP stack (Linux, Apache, MariaDB, PHP)
WordPress requires a web server, database, and PHP. Install everything with one command:
sudo apt install -y apache2 mariadb-server php libapache2-mod-php php-mysql php-xml php-curl php-gd php-mbstring php-zip php-intl
Enable important Apache modules:
sudo a2enmod rewrite headers
Start and enable services:
sudo systemctl enable --now apache2
sudo systemctl enable --now mariadb
Move Apache’s web directory to the SSD and asign the user the right permissions:
sudo systemctl stop apache2

sudo mkdir -p /mnt/ssd/www/html/

sudo rsync -av /var/www/html/ /mnt/ssd/www/html/

sudo chown -R www-data:www-data /mnt/ssd/www

sudo chmod -R 755 /mnt/ssd/www

sudo find /mnt/ssd/www -type d -exec chmod 755 {} \;

sudo find /mnt/ssd/www -type f -exec chmod 644 {} \;
Edit Apache configuration:
sudo nano /etc/apache2/sites-available/000-default.conf
Change:
DocumentRoot /var/www/html
to:
DocumentRoot /mnt/ssd/www/html/
Restart:
sudo systemctl start apache2
Move the MariaDB database storage to the SSD
Stop MariaDB:
sudo systemctl stop mariadb
Move database files:
sudo rsync -av /var/lib/mysql /mnt/ssd/
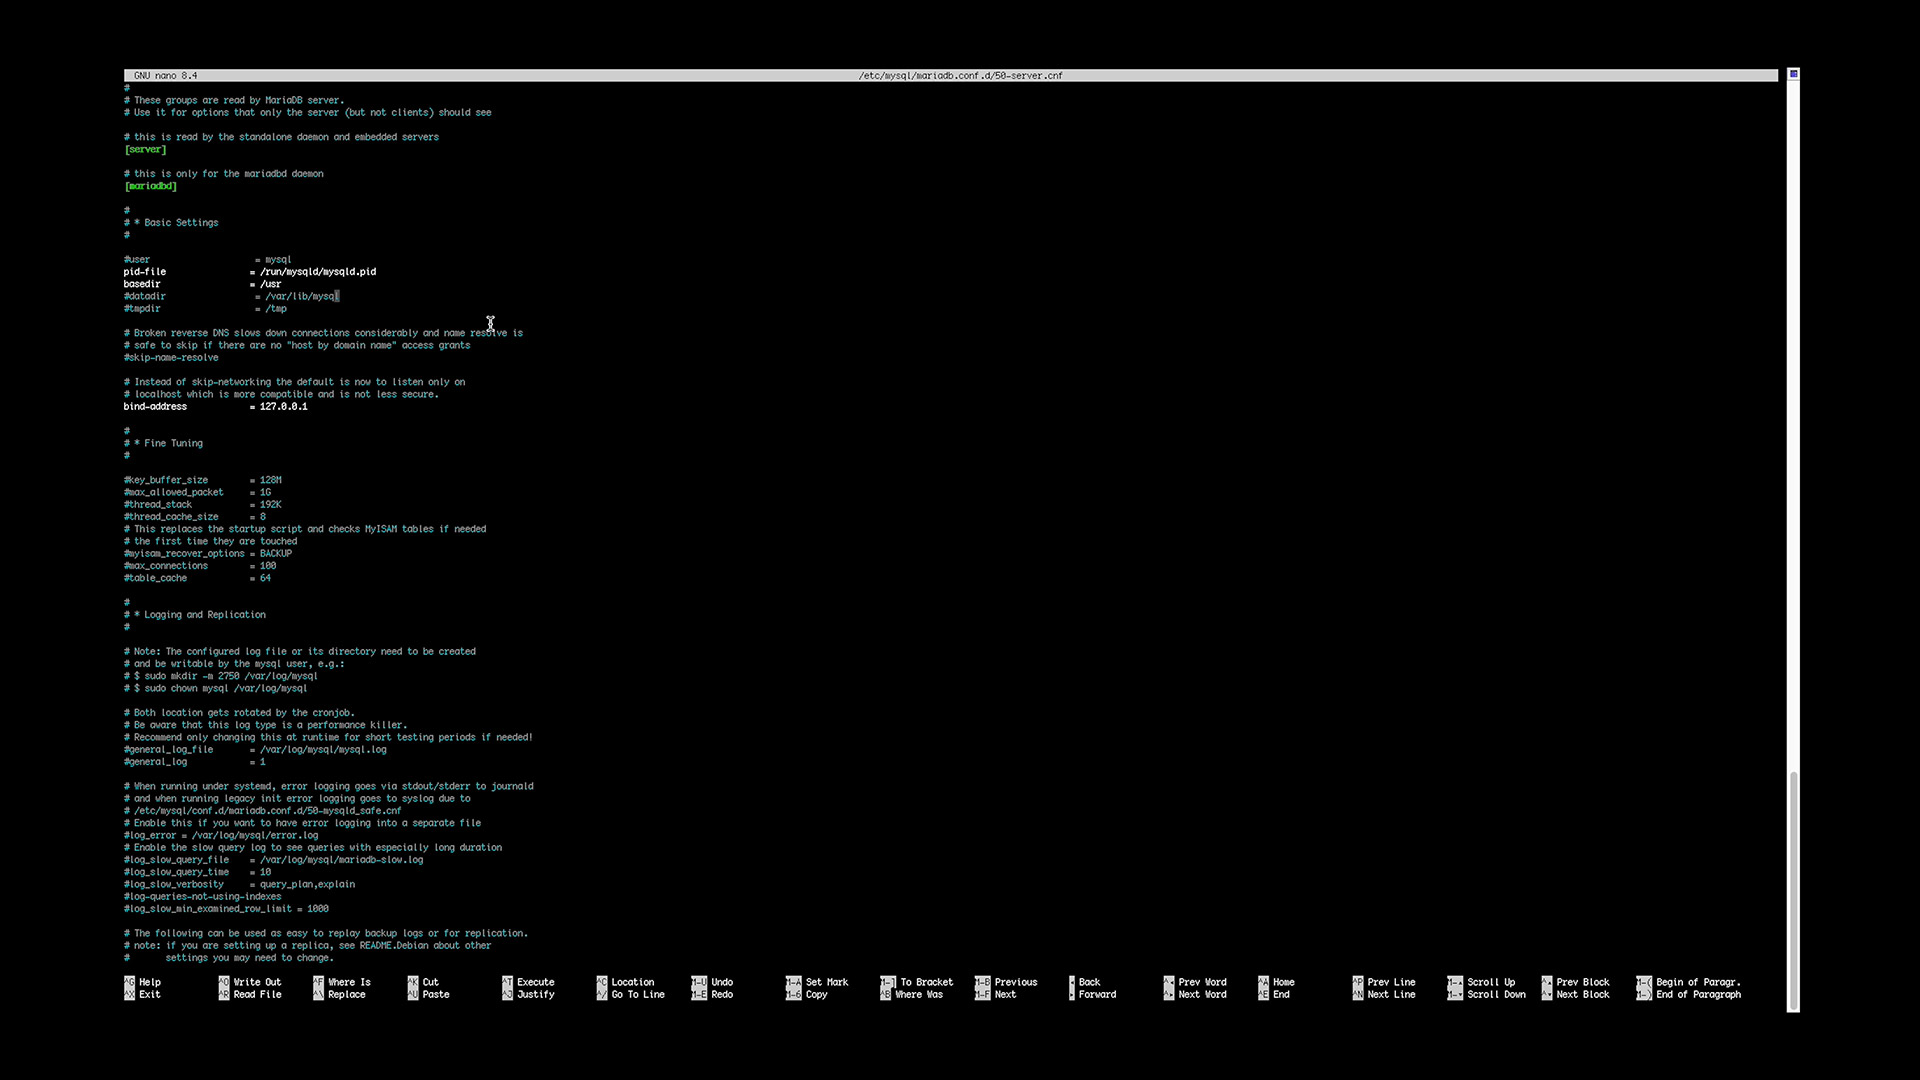
Edit config:
sudo nano /etc/mysql/mariadb.conf.d/50-server.cnf
Change:
datadir = /var/lib/mysql
to:
datadir = /mnt/ssd/mysql
Fix permissions:
sudo chown -R mysql:mysql /mnt/ssd/mysql
Start MariaDB:
sudo systemctl start mariadb
Step 5: secure and configure the MariaDB Database Server
Enter the MariaDB console:
sudo mysql
Paste the following commands to secure your database (replace the placeholder password with your own):
USE mysql;

DELETE FROM mysql.user WHERE User='';

ALTER USER 'root'@'localhost'

IDENTIFIED VIA mysql_native_password

USING PASSWORD('CHANGE_THIS_PASSWORD');

UPDATE mysql.user SET Host='localhost' WHERE User='root';

DROP DATABASE IF EXISTS test;

DELETE FROM mysql.db WHERE Db='test' OR Db LIKE 'test\_%';

FLUSH PRIVILEGES;

EXIT;
This removes anonymous users, secures the root account, and deletes test databases.
Step 6: Create the WordPress database and user
Log back in to MariaDB:
sudo mysql -u root -p
Create a new database and user for WordPress:
CREATE DATABASE wordpress CHARACTER SET utf8mb4 COLLATE utf8mb4_unicode_ci;

CREATE USER 'wpuser'@'localhost' IDENTIFIED BY 'YOUR_WP_PASSWORD';

GRANT ALL PRIVILEGES ON wordpress.* TO 'wpuser'@'localhost';

FLUSH PRIVILEGES;

EXIT;
note: remember to edit the YOUR_WP_PASSWORD.
Step 7: Download and Install WordPress to your SSD
cd /tmp

wget https://wordpress.org/latest.tar.gz

tar xzf latest.tar.gz

sudo rm -rf /mnt/ssd/www/html/*

sudo mv wordpress/* /mnt/ssd/www/html/

sudo chown -R www-data:www-data /mnt/ssd/www/html/
Copy the sample config file:
sudo cp /mnt/ssd/www/html/wp-config-sample.php /mnt/ssd/www/html/wp-config.php
Step 8: Configure wp-config.php
Edit the file:
sudo nano /mnt/ssd/www/html/wp-config.php
Update the database settings:
define('DB_NAME', 'wordpress');

define('DB_USER', 'wpuser');

define('DB_PASSWORD', 'YOUR_WP_PASSWORD');

define('DB_HOST', 'localhost');
Generate WordPress salts (security keys):
curl -s https://api.wordpress.org/secret-key/1.1/salt/
Note: Paste all the generated lines into wp-config.php, replacing the existing keys.
Step 9: Enable permalinks in Apache
Edit Apache’s configuration:
sudo nano /etc/apache2/apache2.conf
Find the block: <Directory /var/www/>
change the directory to /mnt/ssd/www/html/
and change:
AllowOverride None
Change AllowOverride None to:
AllowOverride All
Restart Apache:
sudo systemctl restart apache2
Step 11: Complete the WordPress installation in the browser
Open your browser and go to:
http://192.168.1.50(Use your actual static IP.)
You’ll land on the WordPress install page. Choose:
- Website title
- Username (avoid “admin”)
- Strong password
- Email address
Click Install WordPress — and your website is ready!
What you can do at this point
With your fresh new Raspberry Pi server running WordPress, you can now:
- Develop a website locally
- Build a staging or test server to test updates before deploying them on the real world
- Host your personal or small business webpage
- Experiment with plugins, themes, and server updates
- Prepare the server for secure public access using Cloudflare Tunnel or HTTPS.
The Raspberry Pi 5 and the Compute Module 5 have more than enough performance to serve a typical business website or a personal blog, especially when using an SSD and Ethernet connection.
What are your thoughts on this project? Drop your ideas and potential uses for your own web server in the comments.
Want more? Head over to our blog for more DIY projects and Raspberry Pi tutorials, and subscribe to our YouTube channel for the video guides!