
How to turn your old stereo into a smart audio streamer with Raspberry Pi and Volumio
If you still have an old amplifier, Hi-Fi system, or mini stereo collecting dust at home, this project is for you. With just a Raspberry Pi and the Volumio app, you can upgrade your vintage audio gear to stream music from modern services like Spotify or internet radio — all controlled from your smartphone.
Breathe new life into your vintage sound system. Build an audio streamer with Raspberry Pi and Volumio
This guide will show you how to easily set up a wireless audio streamer that connects your legacy sound equipment to the digital world.
What you’ll need:
- Your vintage sound system (amplifier, mini Hi-Fi, etc.)
- A Raspberry Pi (ideally model 3B, 3B+ or 4)
- A power supply for the Raspberry Pi
- A microSD card and card reader
- RCA to 3.5 mm stereo cable (or other depending on your setup)
- Your smartphone
- Volumio app (available for iOS and Android)
Step 1: check your sound system
First, ensure your sound system has an auxiliary or line input. Most amplifiers will have one, and many mini-stereos label it as «AUX,» «VIDEO,» or «PORTABLE IN.»
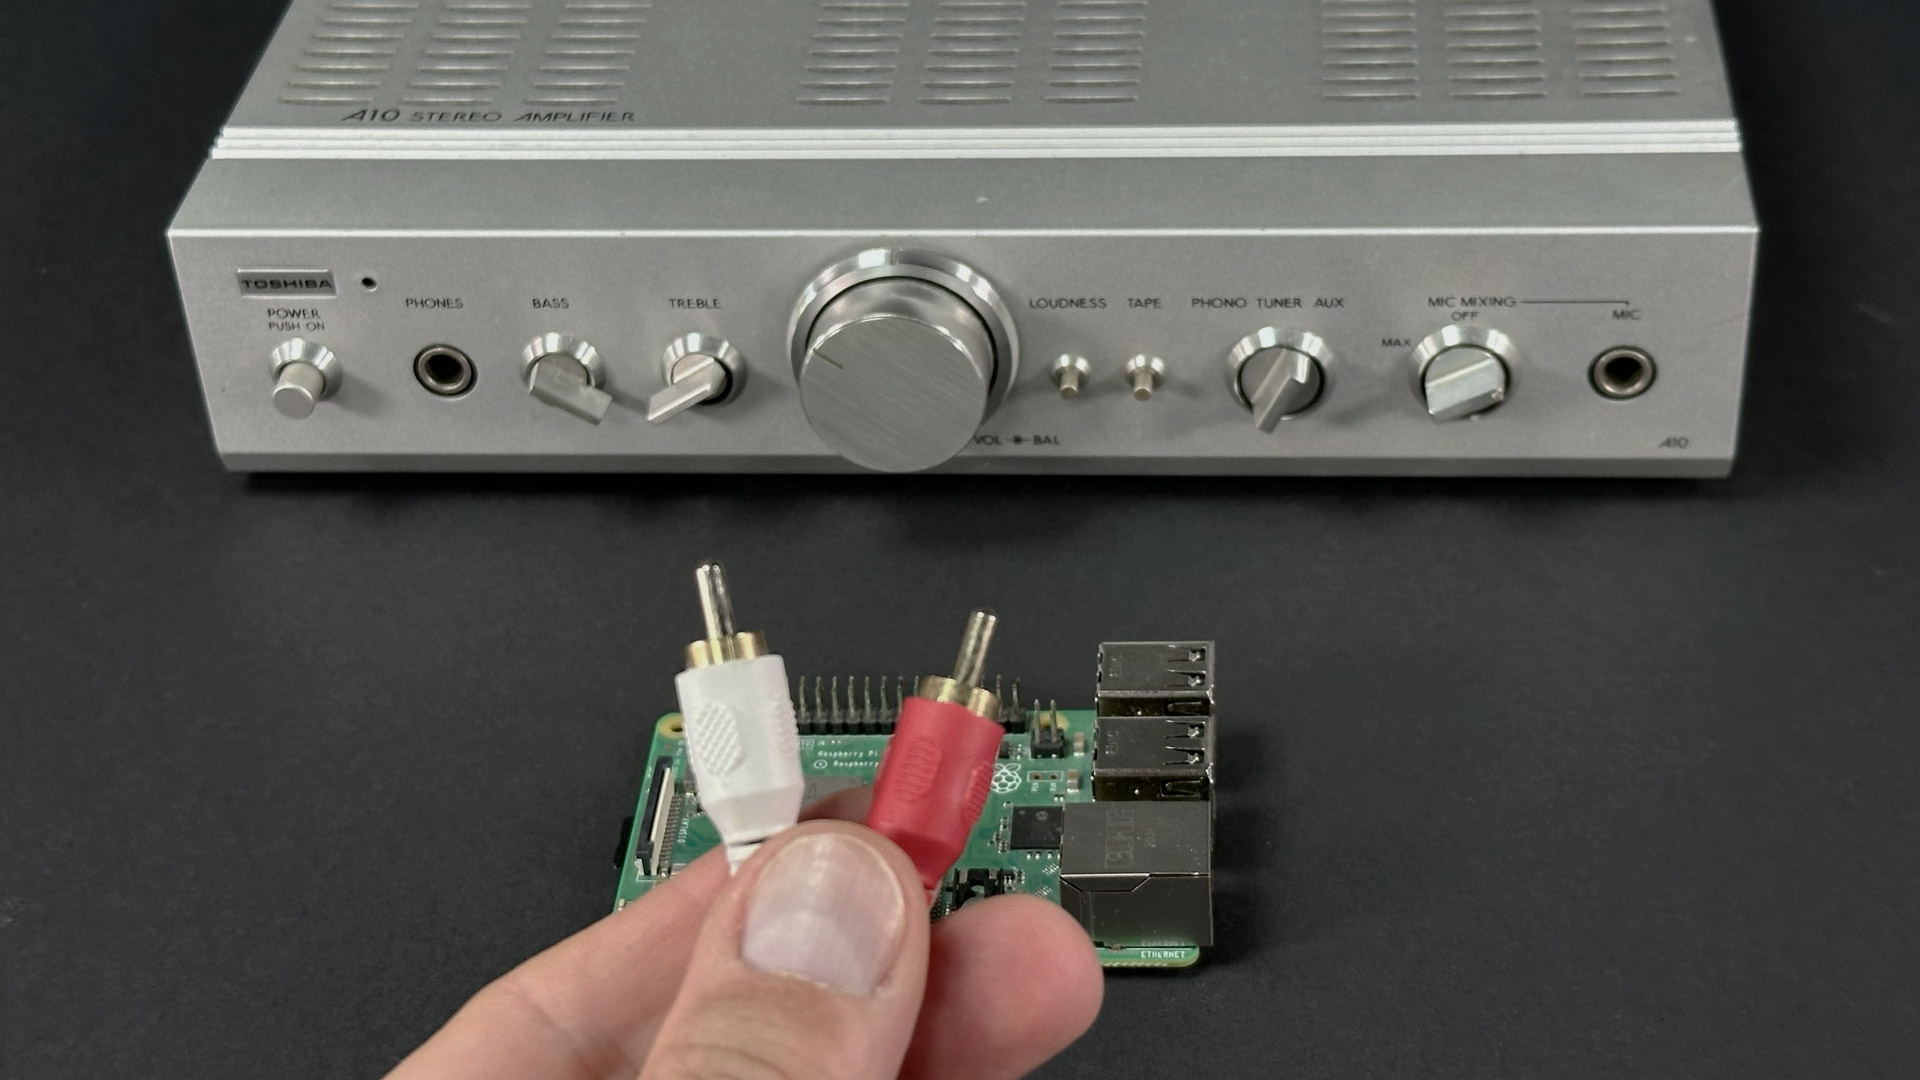
You’ll most likely need an RCA to 3.5mm stereo cable:
- RCA end: red (right) and white (left) plugs connect to your stereo.
- 3.5 mm end: plugs into the Raspberry Pi audio out jack (available on Pi models prior to Raspberry Pi 5).
If your sound system lacks an AUX input, don’t worry — adapters are available.
Step 2: choose the right Raspberry Pi
Volumio supports all Raspberry Pi models, but for smooth performance, we recommend models 3B, 3B+ or 4. Older models may lag and lack built-in Wi-Fi.
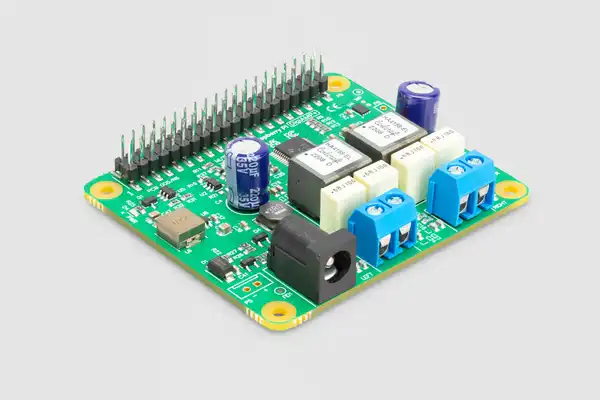
Important: Raspberry Pi 5 doesn’t have an audio jack anymore. To use it with Volumio, you’ll need an audio HAT (Hardware Attached on Top), which connects via the GPIO pins. These HATs are designed to output analog audio and often provide better sound quality than the built-in jack on older Raspberry Pi models. Some HATs include built-in amplifiers, as the Raspberry Pi DigiAMP+, making them ideal if you want to connect passive speakers directly to your Raspberry Pi, making them smart in an instant. Others offer line-level output, which you can route to an external amplifier or your vintage sound system. You can find a wide variety of HATs on the official Raspberry Pi website and from third-party manufacturers — including options tailored for Hi-Fi use with enhanced digital-to-analog converters (DACs). These options let you not only connect old audio equipment but also improve its audio fidelity significantly.
Step 3: install Volumio on your Raspberry Pi
- Insert the microSD card into your card reader and connect it to your computer.
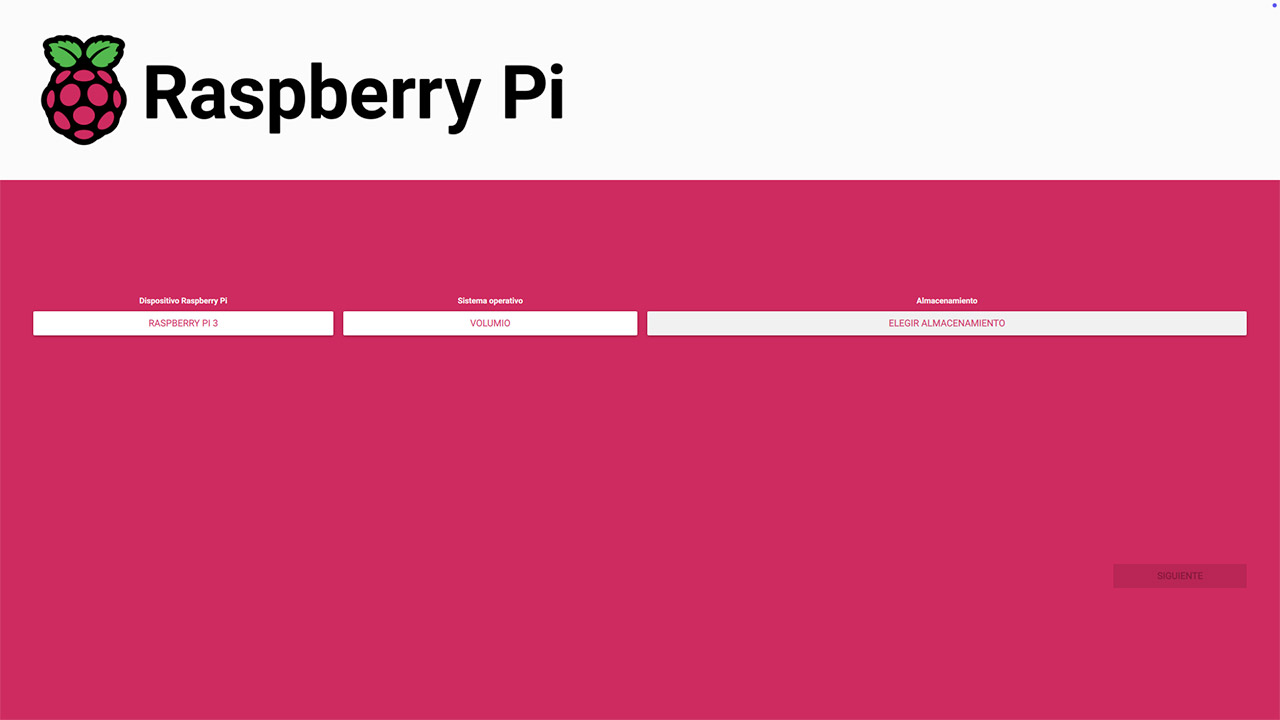
- Open Raspberry Pi Imager.
- Select your Raspberry Pi model.
- Under “Operating System,” go to “Media Player OS” and select Volumio.
- Choose your SD card as the storage device and begin installation.
Once complete, eject the card, insert it into your Raspberry Pi, and power it on. No monitor or keyboard required.
Step 4: set up Volumio
- Install the Volumio app on your smartphone.
- Power up your Raspberry Pi and wait 4–5 minutes for the initial boot.
- On your phone, go to Wi-Fi settings. You’ll see a new network, created by your Raspberry Pi and named like
Volumio-xxxx - Connect to it — this launches the initial setup screen on your phone.
Complete the configuration and your Pi will connect to your home Wi-Fi. Your phone and Volumio are now linked.
Step 5: add music services
To unlock more features, create a free Volumio account. Then:
- Go to Settings > Plugins in the Volumio app.
- Install the Spotify plugin and log in with your account.
- Open Spotify on your phon3, go to the device selector, and choose Volumio — boom! your music will play through your rejuvenated stereo system!
You can also install a YouTube plugin to stream audio directly from the YouTube app to Volumio.
For more tips and documentation, check out Volumio’s help center.
Turn your Raspberry Pi into a media center
If you connect an external monitor via the HDMI port of your Raspberry Pi, you won’t see the Volumio interface—instead, you’ll be taken directly to the Raspberry Pi’s SSH console. However, if you connect a compatible touchscreen display, such as the official Raspberry Pi Touch Display, using the dedicated display connector, you’ll be able to access the Volumio app interface directly on your Raspberry Pi—no mobile device required.
This way, you can transform your Raspberry Pi and vintage audio setup into a sleek, modern streaming system, ready to blast your playlists at full volume!
Try Moode audio
Looking for an alternative? Moode Audio is a more open-source option:
- No account or plugins required.
- Web-based interface.
- Plays local files from USB drives.
However, it’s less user-friendly:
- No dedicated mobile app.
- Internet radio stations must be added manually.
Still, Moode is a great choice if you want more privacy or advanced customization.
Conclusion. Make old tech new again with Raspberry Pi and Volumio
Upgrading your vintage audio gear with Raspberry Pi and Volumio is simple, fun, and opens a world of possibilities. You’ll be surprised at what your old sound system can do with a modern twist.
Give it a try — and when you do, share your setup with us!
For more DIY tech projects, follow our blog and subscribe to our YouTube channel for tutorials, product reviews, and smart tech ideas.
Highly energetic blog, I loved that a lot. Will there be a
part 2?